Fix Common Plumbing Issues Yourself: A Quick Guide
Plumbing problems are an inevitable part of homeownership. While some issues require professional intervention, many common plumbing problems can be fixed easily with a bit of knowledge and the right tools. Tackling minor repairs yourself not only saves money but also prevents small issues from escalating into costly emergencies.
In this comprehensive guide, we’ll explore common plumbing issues you can fix yourself, provide step-by-step instructions, and share tips to help you maintain your home’s plumbing system effectively and safely.
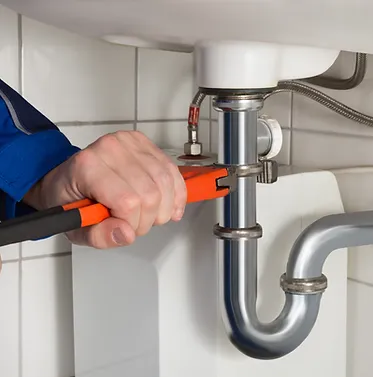
Table of Contents
- Why DIY Plumbing?
- Essential Tools for DIY Plumbing
- Safety Precautions
- Fixing a Leaky Faucet
- Unclogging a Drain
- Repairing a Running Toilet
- Addressing Low Water Pressure
- Fixing a Leaking Pipe
- Replacing a Showerhead
- Installing a New Faucet
- Clearing a Jammed Garbage Disposal
- Maintaining Your Water Heater
- When to Call a Professional
- Preventive Maintenance Tips
- Common Mistakes to Avoid
- Conclusion
- About Wrestore
1. Why DIY Plumbing?
Handling minor plumbing repairs yourself offers several advantages:
Benefits:
- Cost Savings: Avoid labour costs associated with professional services.
- Convenience: Fix issues promptly without waiting for a plumber’s schedule.
- Empowerment: Gain confidence and skills in home maintenance.
- Preventative Care: Regular DIY maintenance can prevent larger problems.
SEO Keywords: DIY plumbing, fix plumbing issues yourself, benefits of DIY repairs
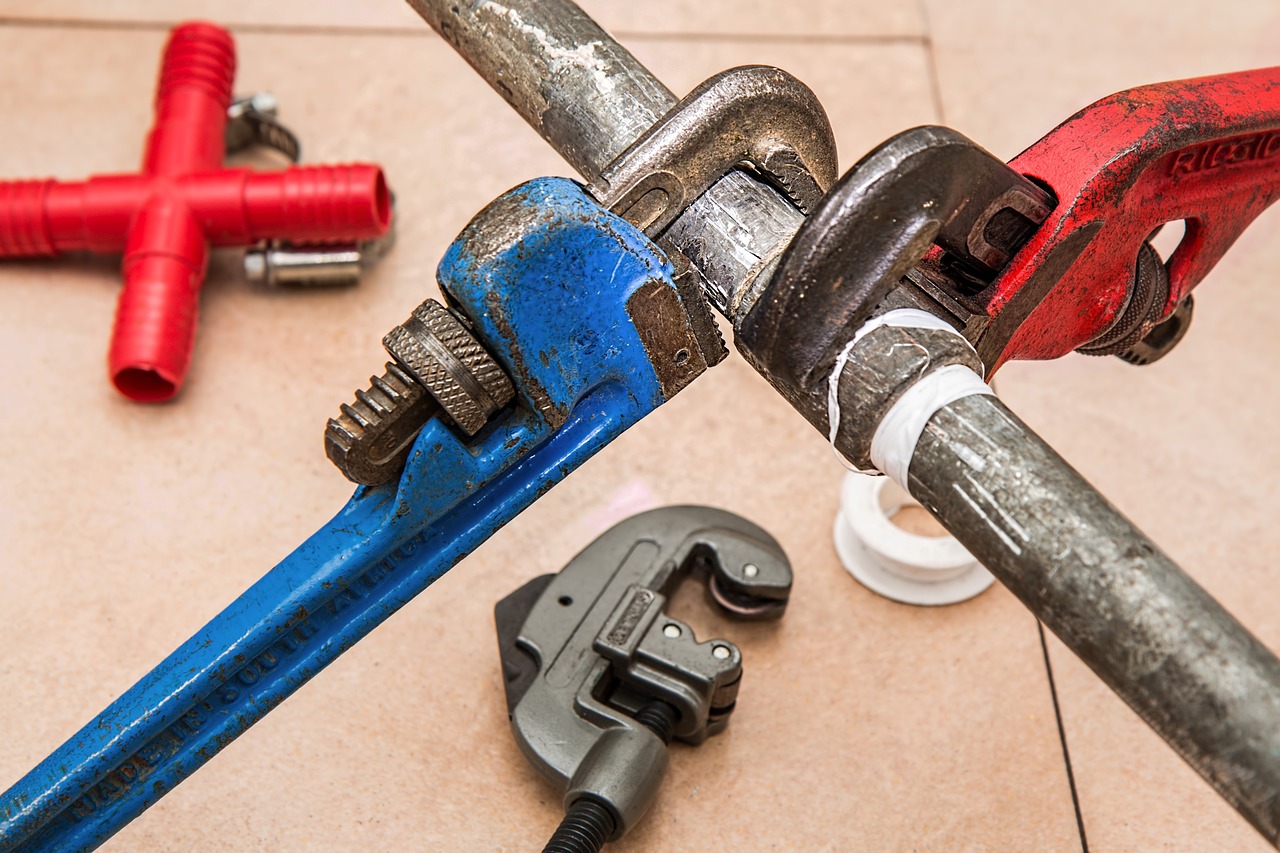
2. Essential Tools for DIY Plumbing
Having the right tools is crucial for effective and safe plumbing repairs.
Basic Plumbing Tools:
- Plunger: Essential for unclogging toilets and drains.
- Adjustable Wrench: Useful for loosening and tightening nuts and fittings.
- Pipe Wrench: Designed for gripping pipes and pipe fittings.
- Plumber’s Tape (Teflon Tape): Seals pipe threads to prevent leaks.
- Basin Wrench: Allows access to hard-to-reach nuts under sinks.
- Plumber’s Snake (Drain Auger): Removes clogs deeper in the drain line.
- Bucket and Towels: For catching water and cleaning spills.
- Gloves and Safety Glasses: Protect your hands and eyes during repairs.
Tip: Investing in quality tools ensures they last longer and perform better.
3. Safety Precautions
Before starting any plumbing project, it’s important to prioritize safety.
Safety Tips:
- Turn Off Water Supply: Shut off the water to the fixture you’re working on to prevent leaks or flooding.
- Disconnect Power: If working near electrical outlets or devices, turn off the power to avoid electric shock.
- Use Protective Gear: Wear gloves and safety glasses to protect against injury.
- Ventilate the Area: Ensure proper ventilation when using chemical cleaners.
- Read Instructions: Follow manufacturer guidelines for tools and replacement parts.
- Work Carefully: Take your time to avoid mistakes and accidents.
SEO Keywords: plumbing safety tips, DIY plumbing precautions, safe home repairs
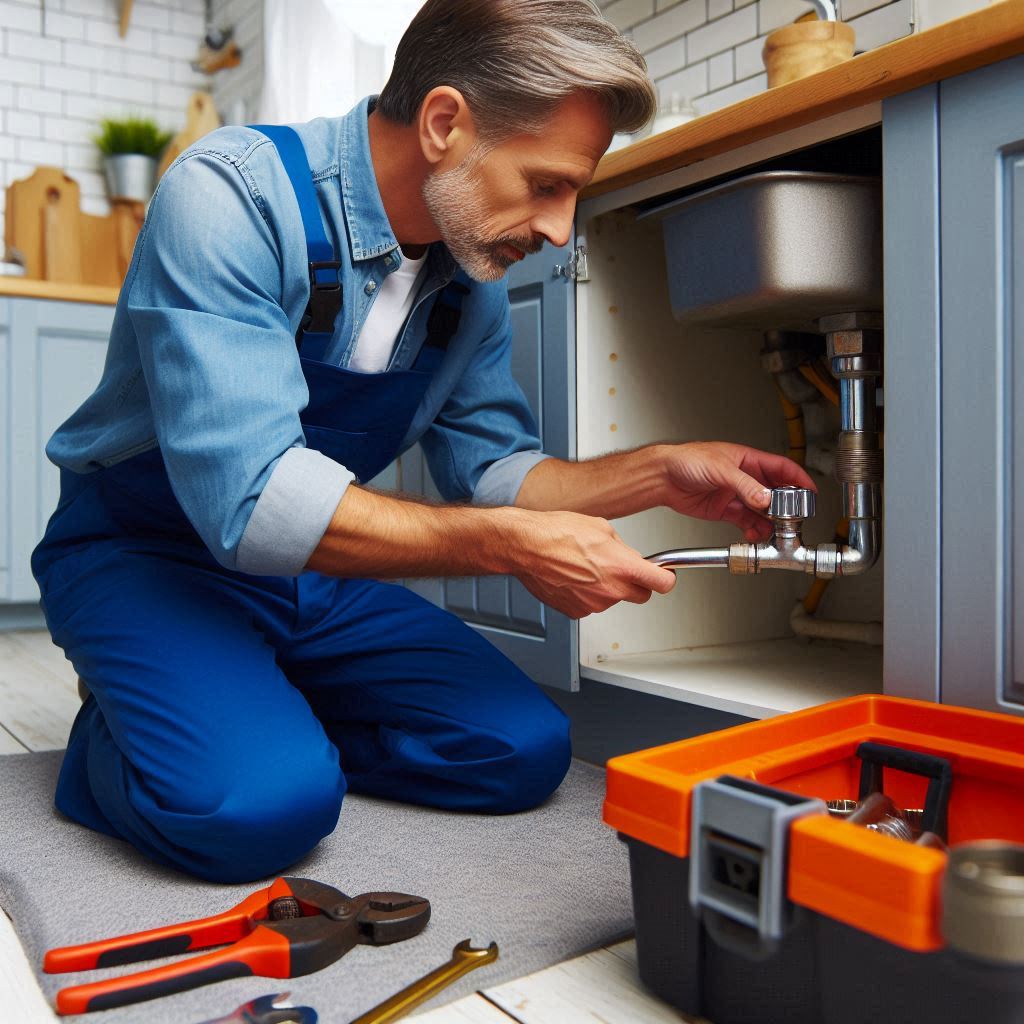
4. Fixing a Leaky Faucet
A dripping faucet can waste water and increase your utility bills. Most leaks are caused by worn-out washers or seals, which are easy to replace.
Step-by-Step Guide:
- Turn Off Water Supply: Shut off the valves under the sink or the main water supply.
- Plug the Drain: Use a sink stopper or rag to prevent small parts from falling down the drain.
- Disassemble the Faucet:
- Remove decorative parts (caps, handles) using a screwdriver or Allen wrench.
- Loosen the packing nut with a wrench.
- Extract the stem or cartridge depending on your faucet type.
- Inspect and Replace Parts:
- Examine O-rings, washers, and seals for wear.
- Replace worn parts with exact matches from a hardware store.
- Reassemble the Faucet: Reverse the disassembly steps, ensuring all parts are tightened securely.
- Turn On Water Supply: Test the faucet to ensure the leak is resolved.
Tip: Take the old parts with you to the store to ensure you purchase the correct replacements.
5. Unclogging a Drain
Clogged drains are common in sinks, showers, and tubs due to hair, soap scum, and debris buildup.
Methods to Unclog Drains:
Using a Plunger:
- Remove Any Drain Cover: Take off the stopper or strainer.
- Fill with Water: Ensure there’s enough water to cover the plunger’s cup.
- Position the Plunger: Place it over the drain, creating a seal.
- Plunge Vigorously: Push down and pull up rapidly several times.
- Check Drainage: Remove the plunger to see if the water drains.
- Repeat if Necessary: Continue until the clog is cleared.
Using a Plumber’s Snake:
- Insert the Snake: Feed the auger into the drain until you feel resistance.
- Rotate and Push: Turn the handle clockwise to break up the clog while pushing forward.
- Retrieve the Snake: Pull it out slowly, bringing up debris.
- Flush the Drain: Run hot water to clear any remaining residue.
Homemade Drain Cleaner:
- Pour Boiling Water: Carefully pour boiling water down the drain.
- Add Baking Soda: Pour half a cup of baking soda and let it sit for a few minutes.
- Add Vinegar: Pour half a cup of white vinegar; it will fizz and break down the clog.
- Wait: Let the mixture sit for 15-30 minutes.
- Flush with Hot Water: Rinse the drain with hot water to clear the clog.
SEO Keywords: unclog drain, DIY drain cleaning, clear clogged sink
6. Repairing a Running Toilet
A running toilet wastes a significant amount of water. The issue is often due to a faulty flapper, fill valve, or float.
Step-by-Step Guide:
- Remove the Tank Lid: Set it aside carefully to avoid breaking.
- Inspect the Flapper:
- Check if the flapper is sealing properly over the flush valve.
- If worn or damaged, replace it.
- Adjust the Float:
- If the water level is too high, adjust the float to lower it.
- For float balls, bend the arm downward slightly.
- For cup floats, adjust the clip or screw mechanism.
- Check the Fill Valve:
- If water is not shutting off, the fill valve may need replacement.
- Follow manufacturer instructions to install a new fill valve.
- Test the Toilet: Flush and observe to ensure the problem is resolved.
Tip: Replacement parts are inexpensive and available at most hardware stores.
7. Addressing Low Water Pressure
Low water pressure can make daily tasks frustrating. It often occurs due to clogged aerators or buildup in pipes.
Fixing Low Water Pressure:
- Clean Faucet Aerators:
- Unscrew the aerator from the faucet tip.
- Disassemble and soak parts in vinegar to dissolve mineral deposits.
- Rinse and reassemble before reinstalling.
- Check Showerheads:
- Remove the showerhead.
- Soak it in vinegar to remove buildup.
- Clean nozzles with a brush if necessary.
- Rinse and reinstall.
- Inspect for Leaks:
- Check visible pipes for leaks that may reduce pressure.
- Repair any leaks found.
- Check the Pressure Reducing Valve (PRV):
- If your home has a PRV, it may need adjustment or replacement.
- Adjust the screw on the valve to increase pressure.
SEO Keywords: low water pressure, improve water pressure, clean faucet aerator
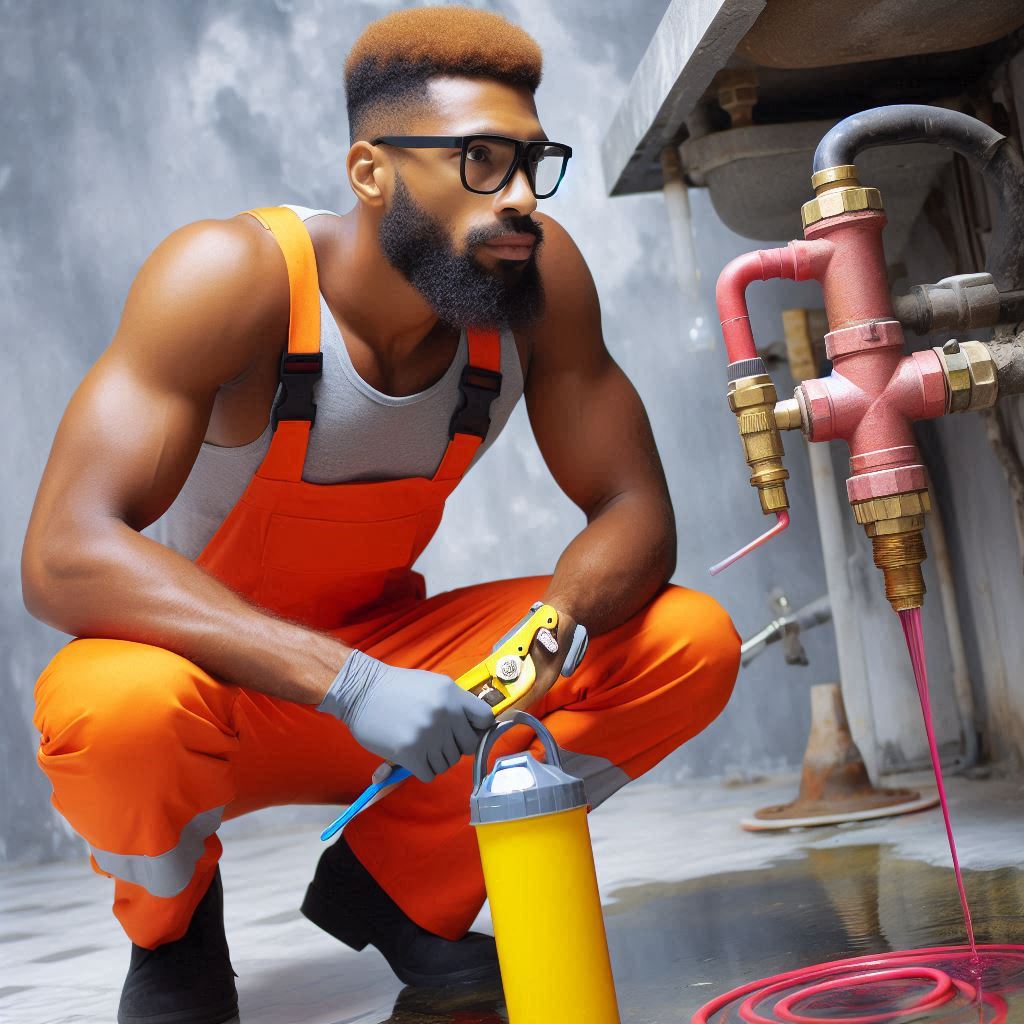
8. Fixing a Leaking Pipe
Leaking pipes can cause water damage if not addressed promptly. Temporary fixes can prevent further damage until a permanent repair is made.
Temporary Fixes:
Using Epoxy Putty:
- Turn Off Water Supply: Shut off the main water valve.
- Dry the Pipe: Wipe the area around the leak.
- Apply Epoxy Putty:
- Knead the putty until it’s pliable.
- Press it over the leak, covering it completely.
- Smooth the edges for a tight seal.
- Allow to Cure: Wait the recommended time before turning the water back on.
Using a Pipe Repair Clamp:
- Turn Off Water Supply.
- Place the Clamp:
- Position the rubber gasket over the leak.
- Fit the clamp over the gasket and tighten securely.
- Test the Repair: Turn the water back on to check for leaks.
Important: These are temporary fixes. It’s advisable to replace the damaged section of the pipe as soon as possible.

9. Replacing a Showerhead
Upgrading or replacing a faulty showerhead can improve water flow and enhance your shower experience.
Steps:
- Remove the Old Showerhead:
- Turn the old showerhead counterclockwise to unscrew it.
- If tight, use an adjustable wrench with a cloth to prevent scratches.
- Clean the Threads: Remove old plumber’s tape and debris from the shower arm threads.
- Apply New Plumber’s Tape: Wrap the threads clockwise with plumber’s tape to ensure a good seal.
- Install the New Showerhead:
- Screw the new showerhead onto the shower arm by hand.
- Tighten gently with a wrench if necessary, avoiding over-tightening.
- Test for Leaks: Turn on the water and check for any leaks around the connections.
Tip: Consider water-saving showerheads to reduce water consumption.
10. Installing a New Faucet
Replacing an old or leaking faucet can refresh your bathroom or kitchen’s appearance and functionality.
Steps:
- Turn Off Water Supply: Shut off valves under the sink or the main water supply.
- Disconnect Supply Lines: Use a wrench to loosen and remove the water supply lines.
- Remove the Old Faucet:
- Loosen the mounting nuts under the sink.
- Lift the faucet out from above.
- Clean the Sink Surface: Remove old sealant and debris.
- Install the New Faucet:
- Place the gasket or apply plumber’s putty as per manufacturer instructions.
- Insert the faucet into the mounting holes.
- Secure it from underneath with mounting nuts.
- Reconnect Supply Lines: Attach the water lines to the faucet’s tailpieces.
- Turn On Water Supply: Check for leaks and ensure proper operation.
SEO Keywords: install new faucet, replace kitchen faucet, DIY faucet installation
11. Clearing a Jammed Garbage Disposal
A jammed garbage disposal can halt your kitchen cleanup. Often, the issue is caused by food debris or foreign objects lodged inside.
Steps to Clear the Jam:
- Turn Off Power: Unplug the disposal or switch off the circuit breaker.
- Locate the Reset Button: Usually found at the bottom of the unit; press it to reset.
- Manually Turn the Blades:
- Insert an Allen wrench into the hole at the bottom center of the disposal.
- Turn the wrench back and forth to free the blades.
- Remove Debris from Above:
- Use tongs or pliers to extract any visible obstructions from the sink opening.
- Never put your hand inside the disposal.
- Restore Power and Test: Turn the power back on and run water to test the disposal.
Important: Always ensure the power is off before attempting to clear a jam to prevent injury.
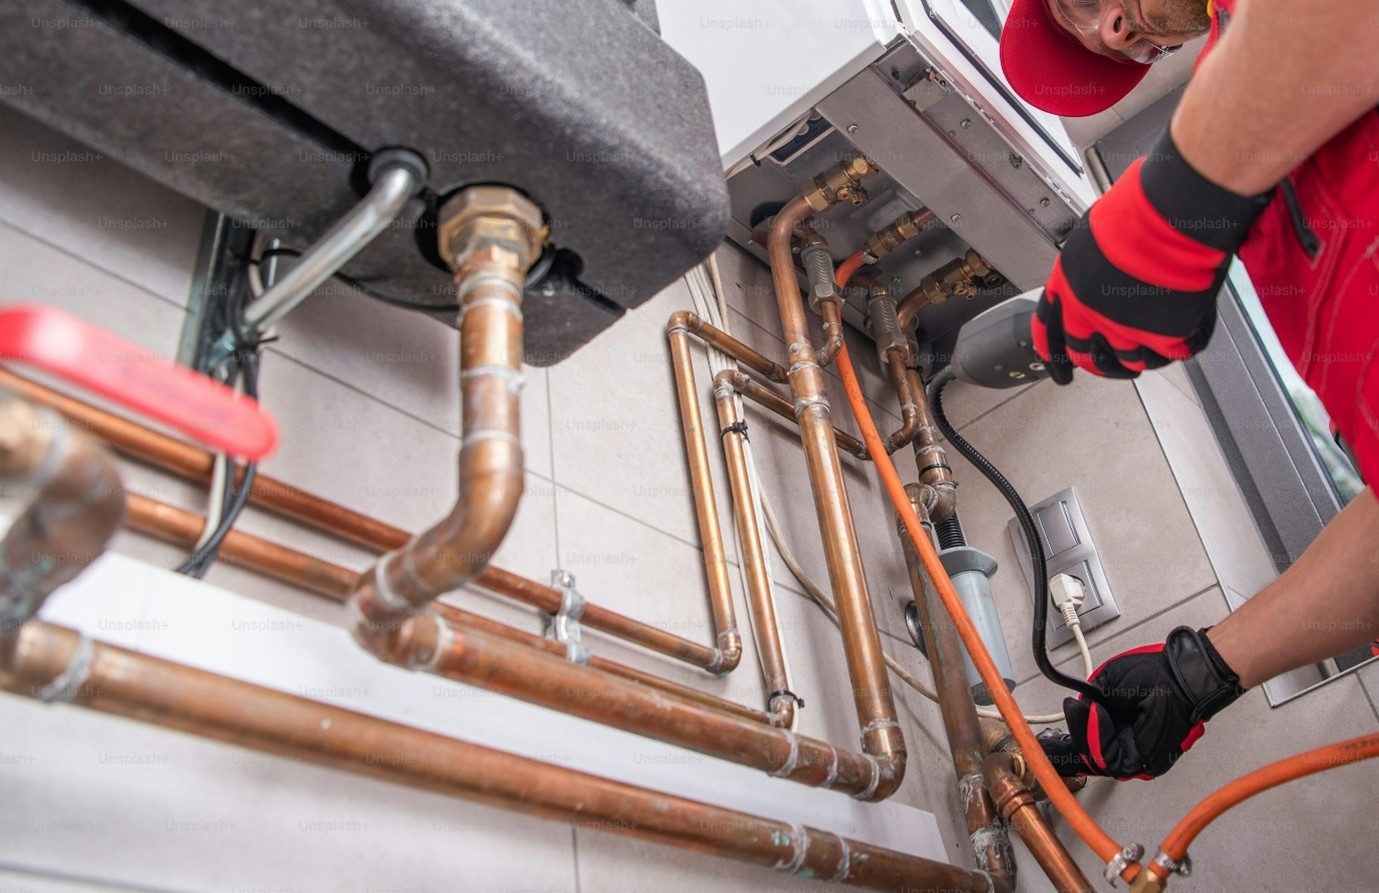
12. Maintaining Your Water Heater
Regular maintenance of your water heater improves efficiency and extends its lifespan.
Steps:
- Turn Off Power and Water Supply:
- For electric heaters, switch off the circuit breaker.
- For gas heaters, set the thermostat to “pilot.”
- Close the cold water supply valve.
- Drain the Tank:
- Attach a garden hose to the drain valve at the bottom of the tank.
- Open a hot water faucet in the house to allow air into the system.
- Open the drain valve and let the water flow out.
- Flush the Tank:
- Once drained, briefly open the cold water supply to stir up remaining sediment.
- Drain again until the water runs clear.
- Close Valves and Refill:
- Close the drain valve and remove the hose.
- Open the cold water supply valve to refill the tank.
- Leave the hot water faucet open until water flows steadily to release air.
- Restore Power:
- Turn the power back on for electric heaters.
- Set the thermostat back to the desired setting for gas heaters.
Tip: Perform this maintenance annually to prevent sediment buildup.
13. When to Call a Professional
While many plumbing issues can be handled DIY, some situations require professional expertise to ensure safety and compliance with regulations.
Situations Requiring Professionals:
- Major Leaks or Bursts: Significant water damage risk requires immediate professional attention.
- Sewer Line Issues: Problems with sewer lines are complex and hazardous.
- Gas Line Repairs: Any work involving gas should be handled by certified professionals.
- Water Heater Replacement: Installing new units may require permits and professional installation.
- Building Code Compliance: Ensuring work meets local regulations and standards.
SEO Keywords: professional plumber, when to hire a plumber, complex plumbing issues
14. Preventive Maintenance Tips
Regular maintenance helps prevent plumbing problems and extends the life of your fixtures and appliances.
Tips:
- Inspect for Leaks: Regularly check under sinks and around appliances for signs of leaks.
- Maintain Drains: Use drain screens to prevent debris from entering pipes.
- Avoid Chemical Drain Cleaners: They can damage pipes; opt for mechanical methods instead.
- Winterize Pipes: Insulate exposed pipes to prevent freezing in cold weather.
- Know Your Shut-Off Valves: Familiarize yourself with the location of main and fixture-specific shut-off valves.
- Check Water Pressure: Excessive pressure can strain your plumbing system; consider installing a pressure regulator if needed.
Tip: Regularly scheduled maintenance can save you from costly repairs in the future.
15. Common Mistakes to Avoid
Avoiding common errors can make your DIY plumbing efforts more successful and prevent further issues.
Mistakes:
- Overtightening Connections: Can damage threads and cause leaks.
- Ignoring Small Leaks: Minor drips can lead to bigger problems if not addressed promptly.
- Using Mismatched Parts: Always use parts compatible with your plumbing system.
- Improper Use of Plumber’s Tape: Wrap tape clockwise around threads to ensure a proper seal.
- Forgetting to Turn Off Water: Can result in flooding and water damage.
- Overusing Chemical Drain Cleaners: Can corrode pipes and harm the environment.
SEO Keywords: plumbing mistakes, avoid DIY errors, successful plumbing repairs
16. Conclusion
Fixing common plumbing issues yourself is a practical way to save money and maintain your home’s functionality. By understanding the basics of your plumbing system and following safe, step-by-step methods, you can handle minor repairs confidently. Remember to always prioritize safety, use the right tools, and know when it’s time to call in a professional.
Empowering yourself with these skills not only enhances your home maintenance capabilities but also provides peace of mind knowing you can address common problems promptly. Keep this guide handy as a reference for future plumbing tasks.
17. About Wrestore
Commercial and Residential Property Maintenance Specialists
At Wrestore, we understand the importance of a well-maintained plumbing system. As a locally run and owned property maintenance company based in London, we have over 30 years of combined experience in the property and built environment sector. Serving areas within the M25, we provide affordable managed maintenance work for commercial and residential properties.
Our Services Include:
- Plumbing Services: From fixing leaks to installing new fixtures and full system overhauls.
- General Maintenance: Keeping your property in optimal condition.
- Electrics: Safe and certified electrical repairs and installations.
- Decorating: Transforming your space with professional painting and decorating.
- Refurbishment: Comprehensive property upgrades.
- Handyman Services: Versatile assistance for all those little jobs around the home.
Why Choose Wrestore?
- Reliability: We deliver a hassle-free, dependable service that you can count on.
- Expertise: Our experienced team ensures high-quality workmanship.
- Accredited: We are accredited by Alcumus SafeContractor, Alcumus SafePQQ, and Gas Safe Register, ensuring our services meet high safety and quality standards.
- Customer Satisfaction: See our reviews on Trustpilot and discover why our clients trust us with their properties.
Contact Us Today
Phone: +44 (0)207 183 2771
Email: works@wrestore.co.uk
Address: 227 Waterloo Road, London, SE1 8XH
Visit our website to learn more about how we can assist you in maintaining and enhancing your property.
Taking care of common plumbing issues yourself can be rewarding and cost-effective. Equip yourself with the knowledge and tools, and tackle those minor repairs with confidence.
Note: This blog post is intended for informational purposes and should not replace professional advice. Always consult qualified professionals for specific concerns related to your property’s plumbing system.
10 Common Plumbing Problems and How to Prevent Them
SEO Meta-Description: Discover the top 10 common plumbing problems and learn effective prevention tips to keep your plumbing system running smoothly. Contact Wrestore for professional plumbing services.
Introduction
Plumbing issues are inevitable, but knowing how to prevent them can save you time, money, and stress. This article covers the ten most common plumbing problems homeowners face and provides practical prevention tips. From clogged drains to frozen pipes, we’ve got you covered.
Clogged Drains
Clogged drains are one of the most frequent plumbing problems. They can be caused by hair, soap scum, grease, and food particles building up over time.
Prevention Tips:
- Use drain guards to catch debris.
- Avoid pouring grease down the sink.
- Regularly clean your drains with a mixture of baking soda and vinegar.
DIY Unclogging Methods:
- Plunge the drain using a plunger.
- Use a plumbing snake to remove blockages.
- Try a natural drain cleaner before opting for harsh chemicals.
When to Call a Plumber: If DIY methods don’t work or the clog keeps returning, it’s time to call a professional to inspect the issue.
Leaky Faucets
A leaky faucet is not just annoying but can also lead to water wastage and higher utility bills.
Common Causes:
- Worn-out washers or gaskets.
- Corroded valve seats.
- Loose parts or broken plumbing.
Preventive Maintenance:
- Regularly check and tighten faucet components.
- Replace washers and gaskets periodically.
Fixing Minor Leaks:
- Turn off the water supply.
- Disassemble the faucet to identify the issue.
- Replace damaged parts.
Professional Repair: For persistent leaks or if you’re unsure how to fix them, professional assistance is recommended.
Running Toilets
A running toilet can waste up to 200 gallons of water daily.
Causes and Symptoms:
- Worn-out flapper valve.
- Improperly adjusted float.
- Refill tube issues.
How to Prevent:
- Regularly inspect toilet components.
- Adjust the float to the correct level.
- Replace the flapper if it’s worn out.
DIY Fixes:
- Replace faulty parts with new ones.
- Adjust the float arm for proper water level.
Long-term Solutions: For ongoing issues, consider upgrading to a more efficient toilet system.
Low Water Pressure
Low water pressure can result from various issues, including clogged pipes, faulty fixtures, or water supply problems.
Common Causes:
- Sediment buildup in pipes.
- Leaks in the plumbing system.
- Corroded pipes.
How to Diagnose:
- Check pressure in different faucets.
- Inspect for leaks around the house.
- Examine the water meter for unusual readings.
Preventive Measures:
- Regularly clean aerators and showerheads.
- Flush the water heater to remove sediment.
- Inspect and repair leaks promptly.
DIY Fixes:
- Clean or replace aerators.
- Check for leaks and seal them.
- Use a water pressure booster if necessary.
When to Seek Professional Assistance: If low water pressure persists, it’s best to consult a plumber to identify and resolve underlying issues.
Water Heater Issues
Water heater problems can disrupt your daily routine, especially if you rely on hot water for various tasks.
Common Problems:
- No hot water.
- Inconsistent water temperature.
- Strange noises from the heater.
- Leaking water heater.
Preventive Maintenance:
- Flush the tank annually to remove sediment.
- Insulate the tank to maintain efficiency.
- Regularly check for leaks and corrosion.
DIY Troubleshooting:
- Check the thermostat settings.
- Inspect the pilot light (for gas heaters).
- Test the heating element (for electric heaters).
Importance of Professional Inspection: For complex issues, professional inspection and repair are crucial to avoid further damage and ensure safety.
Burst Pipes
Burst pipes can cause significant water damage and require immediate attention.
Causes:
- Freezing temperatures.
- Corrosion over time.
- Excessive water pressure.
Warning Signs:
- Sudden drop in water pressure.
- Wet spots on walls or ceilings.
- Unusual noises from the pipes.
Prevention Strategies:
- Insulate exposed pipes.
- Keep the home warm during cold weather.
- Regularly check and maintain pipe conditions.
Emergency Steps:
- Shut off the main water supply.
- Drain the water from the system.
- Call a professional plumber for repairs.
Sewer System Backup
A sewer system backup is a severe issue that can lead to unpleasant odors and health hazards.
Causes and Symptoms:
- Tree roots infiltrating sewer lines.
- Blockages from non-flushable items.
- Broken or collapsed sewer pipes.
Preventive Maintenance:
- Regularly inspect and clean sewer lines.
- Avoid flushing non-degradable items.
- Plant trees away from sewer lines.
DIY Tips:
- Use enzyme-based cleaners to maintain clear pipes.
- Regularly check for tree root intrusion.
When to Call Professionals: If backups occur frequently or are severe, professional intervention is necessary to resolve the issue.
Faulty Water Lines
Faulty water lines can disrupt water supply and cause leaks.
Common Issues:
- Leaks or bursts in the line.
- Corrosion and rust.
- Pressure imbalances.
How to Detect:
- Monitor water meter for unusual activity.
- Inspect the yard for soggy spots.
- Check for reduced water pressure.
Preventive Maintenance:
- Regularly inspect water lines for wear and tear.
- Replace old or damaged pipes.
- Maintain proper water pressure.
Repair Tips:
- Shut off the water supply before repairs.
- Use pipe repair clamps for temporary fixes.
- Consult a professional for extensive repairs.
Sump Pump Failure
Sump pumps are crucial for preventing basement flooding.
Causes of Failure:
- Power outages.
- Mechanical failure.
- Clogged discharge lines.
Preventive Maintenance:
- Test the pump regularly.
- Clean the pump and discharge lines.
- Install a battery backup system.
Troubleshooting Tips:
- Check the power source.
- Inspect for clogs and debris.
- Ensure the float switch is operational.
When to Replace: If the pump is old or frequently fails, consider replacing it with a new, reliable model.
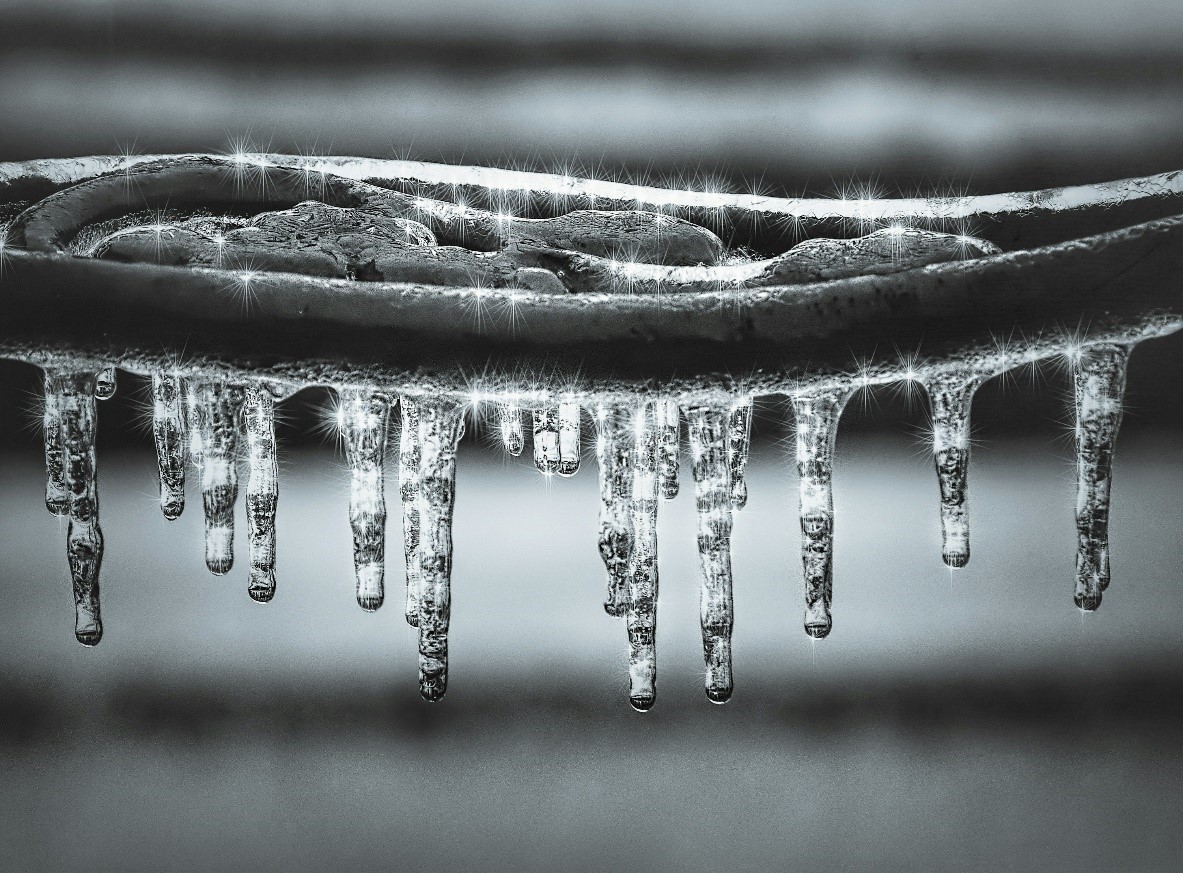
Frozen Pipes
Frozen pipes can burst and cause significant damage.
Causes:
- Exposure to freezing temperatures.
- Poor insulation.
- Inadequate heating.
Prevention Tips:
- Insulate exposed pipes.
- Keep the home adequately heated.
- Allow faucets to drip during extreme cold.
How to Thaw Safely:
- Use a hairdryer or heat lamp.
- Apply heat slowly to avoid pipe damage.
- Keep the faucet open while thawing.
Emergency Measures: If a pipe bursts, shut off the main water supply and call a plumber immediately.
FAQs
What causes clogged drains?
Clogged drains are often caused by hair, soap scum, grease, and food particles accumulating in the pipes.
How can I prevent leaky faucets?
Regularly check and tighten faucet components, and replace washers and gaskets periodically to prevent leaks.
Why does my toilet keep running?
A running toilet can be due to a worn-out flapper valve, improperly adjusted float, or issues with the refill tube.
What should I do if I have low water pressure?
Check for sediment buildup, leaks, or corroded pipes, and clean or replace aerators. If the issue persists, consult a plumber.
How often should I flush my water heater?
Flush your water heater at least once a year to remove sediment buildup and maintain efficiency.
Conclusion
Preventing plumbing problems requires regular maintenance and prompt attention to minor issues. By following these tips, you can avoid major repairs and ensure your plumbing system functions smoothly. Regular inspections and professional assistance when necessary will help keep your home’s plumbing in top condition. Contact Wrestore for professional plumbing services and expert advice.
Leak detection is an essential aspect of maintaining UK homes and apartments. With the country’s variable climate, aging infrastructure, and rising water and energy costs, undetected leaks can lead to significant financial burdens, property damage, and health hazards. This comprehensive guide explores the causes, detection methods, technologies, and preventive measures for managing leaks in residential properties across the UK.
Why Leak Detection Matters
Leak detection is crucial for several reasons:
Cost Savings: Water and gas leaks can significantly increase utility bills. Identifying and fixing leaks promptly can save homeowners and tenants considerable amounts of money.
Property Protection: Water leaks can cause severe damage to a property’s structure, including walls, floors, and foundations. Gas leaks pose safety risks, including fire hazards and explosions.
Health and Safety: Damp environments from water leaks promote mold growth, which can lead to respiratory issues and other health problems. Gas leaks can lead to carbon monoxide poisoning, which is potentially fatal.
Environmental Impact: Water wastage due to leaks contributes to the depletion of natural water resources. Efficient leak detection helps conserve water, a vital resource.
Common Causes of Leaks in UK Homes
Understanding the common causes of leaks can aid in their prevention and early detection. The primary causes include:
Aging Infrastructure: Many UK homes have old plumbing systems. Over time, pipes can corrode or degrade, leading to leaks.
Weather Conditions: The UK’s variable weather, including freezing temperatures in winter, can cause pipes to expand and contract, leading to cracks and leaks.
Poor Installation: Inadequately installed pipes and fittings can become loose or fail, resulting in leaks.
High Water Pressure: Excessively high water pressure can stress pipes and joints, causing them to burst or leak.
Wear and Tear: Everyday use can lead to wear and tear on appliances and fixtures, such as washing machines, dishwashers, and toilets, which can develop leaks over time.
Leak Detection Techniques for UK Homes
There are various techniques and tools available for detecting leaks in homes and apartments. Here’s an overview of the most effective methods:
Visual Inspection
Visual inspection is the simplest method to detect leaks. Regularly checking visible pipes, appliances, and fixtures can help identify signs of leaks, such as:
Water stains on walls, ceilings, or floors.
Damp or musty odors.
Visible mold or mildew growth.
Unexplained puddles or wet spots.
While this method is straightforward, it may not detect hidden or small leaks.
Water Meter Monitoring
Monitoring your water meter can help detect leaks. Here’s how:
Turn off all water fixtures and appliances.
Note the water meter reading.
Wait for a couple of hours without using any water.
Check the meter again. If the reading has changed, there may be a leak.
This method is effective for detecting significant leaks but may not identify very small leaks
Acoustic Leak Detection
Acoustic leak detection involves using specialized devices to listen for the sound of water escaping from pipes. Professional plumbers often use this method to pinpoint the exact location of a leak. It’s particularly useful for detecting leaks in walls, floors, or underground pipes.
Thermal Imaging
Thermal imaging cameras detect temperature variations caused by leaks. Water leaks often create cool spots, while gas leaks can create warm spots. This non-invasive method is useful for detecting hidden leaks behind walls and under floors.
Dye Testing
Dye testing involves adding a non-toxic dye to the water system and checking if it appears in areas where it shouldn’t, such as around toilets, sinks, or bathtubs. This method helps identify leaks in specific fixtures and appliances.
Smart Leak Detectors
Smart leak detectors are devices that can be installed in various parts of your home to monitor for leaks. They often come with sensors that detect water, changes in humidity, or even temperature variations. Many smart leak detectors can send alerts to your smartphone, enabling you to act quickly.
Advanced Leak Detection Technologies
With technological advancements, several innovative leak detection methods have emerged, offering enhanced accuracy and reliability.
Fiber Optic Sensing
Fiber optic sensing involves embedding fiber optic cables along pipelines. These cables detect changes in temperature, strain, and acoustics, indicating a leak’s presence and location.
Distributed Temperature Sensing (DTS): Monitors temperature changes along the pipeline.
Distributed Acoustic Sensing (DAS): Detects acoustic signals associated with leaks.
Fiber optic sensing provides continuous monitoring and can detect leaks in real-time, making it ideal for critical infrastructure.
Smart Water Meters
Smart water meters are equipped with advanced sensors and communication technology to detect leaks in residential and commercial plumbing systems. These meters provide real-time data on water usage and can alert users to potential leaks.
Flow Sensors: Monitor water flow rates and detect anomalies.
Pressure Sensors: Detect pressure drops associated with leaks.
Smart water meters empower consumers to monitor their water usage and address leaks promptly, reducing water wastage and associated costs.
Satellite Leak Detection
Satellite leak detection uses satellite imagery and remote sensing technology to detect leaks in large-scale water and oil pipelines. Satellites equipped with specialized sensors can identify changes in soil moisture, temperature, and vegetation health, indicating potential leaks.
Synthetic Aperture Radar (SAR): Detects ground deformation caused by leaks.
Multispectral Imaging: Identifies changes in vegetation health due to leaks.
Satellite leak detection is effective for monitoring extensive pipeline networks, particularly in remote or inaccessible areas.
Practical Tips for Leak Prevention and Management
Regular Inspections: Conduct regular inspections of your plumbing system, especially if your home is older. Check for signs of wear and tear, corrosion, or damage.
Insulate Pipes: In colder months, insulate exposed pipes to prevent them from freezing and bursting.
Monitor Water Pressure: Ensure that your home’s water pressure is within a safe range. High pressure can damage pipes and fixtures. Installing a pressure regulator can help maintain optimal pressure levels.
Maintain Appliances: Regularly maintain and inspect household appliances like washing machines, dishwashers, and water heaters. Replace old or worn-out hoses and fittings.
Install Leak Detectors: Invest in smart leak detectors for high-risk areas such as basements, kitchens, and bathrooms. These devices provide early warnings and can help prevent major damage.
Know Your Stopcock: Ensure you know the location of your stopcock (or main water valve) and how to operate it. In case of a major leak, turning off the water supply quickly can prevent extensive damage.
Educate Residents: If you live in an apartment or shared housing, educate all residents about the signs of leaks and the importance of reporting them promptly.
Case Studies: Successful Leak Detection in UK Homes
Case Study 1 Leak Detection Kennington: Victorian Terrace
A Victorian terrace house in London experienced damp patches on the walls and ceiling. After a thorough visual inspection and using a moisture meter, the homeowner discovered a hidden leak in the roof. The leak was promptly repaired, preventing further damage and reducing the risk of mold growth.
Case Study 2 Leak Detection Knightsbridge: Modern Apartment
Residents of a modern apartment complex in London noticed unusually high water bills. The property management installed smart water meters in each unit. The meters detected a slow leak in one apartment’s bathroom. Early detection and repair saved the tenant from potential water damage and reduced the overall water consumption for the building.
Case Study 3 Leak Detection Hampstead: Cottage
A cottage in the Hampstead had an old plumbing system prone to leaks. During a routine inspection, a plumber used acoustic leak detection equipment to identify a leak in an underground pipe. The leak was fixed before it could cause significant damage to the property’s foundation.

Conclusion
Leak detection is a critical aspect of maintaining the integrity and safety of UK homes and apartments. With advancements in technology, detecting leaks has become more precise and efficient. By understanding the causes of leaks, employing a range of detection techniques, and implementing proactive management practices, you can safeguard your property, protect the environment, and ensure the health and safety of your household.
Investing in the right tools and technologies, training your team, and staying vigilant through regular inspections are essential steps in effective leak detection and prevention. As we move towards smarter and more connected infrastructure, the role of innovative leak detection methods will continue to grow, making our systems more resilient and sustainable.
Whether you are managing a municipal water network, an industrial facility, or a residential property, this comprehensive guide to leak detection provides the knowledge and insights needed to address leaks effectively and maintain the integrity of your systems.
At Wrestore our plumbers have all the experience and tools needed to find and address any leaks you may have. Please do get in contact with one of the team for plumbing services near me now on 0207 183 2771 via call or whats app or chat to us online through our website