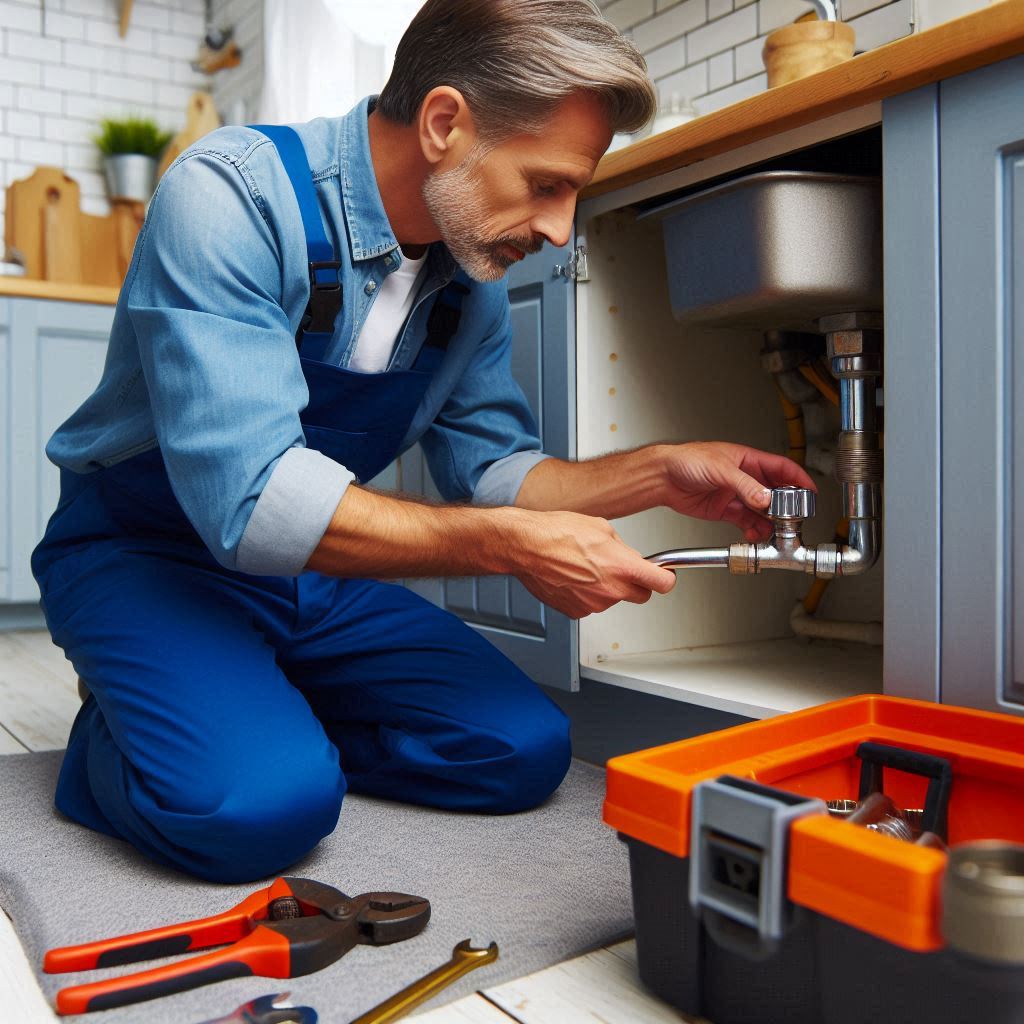
How to Save on Energy Bills with Smart Property Maintenance
As energy costs continue to rise, finding ways to save on energy bills has become a priority for many homeowners. Smart property maintenance not only helps in reducing utility costs but also contributes to a greener environment. This comprehensive guide from Wrestore explores various energy-efficient maintenance tips, upgrades, and practices to help you achieve significant savings on your energy bills.
Insulating Attics and Walls
The Importance of Insulation
Proper insulation is crucial in maintaining a consistent indoor temperature, which reduces the need for excessive heating or cooling. Insulating your attic and walls can prevent heat loss during winter and keep your home cooler in summer.
Types of Insulation:
- Loft Insulation: Adding or upgrading loft insulation is one of the most cost-effective ways to improve energy efficiency. Materials like mineral wool, sheep wool, or foam boards are commonly used.
- Cavity Wall Insulation: For homes with cavity walls, filling the gap with insulation material can significantly reduce heat loss.
- Solid Wall Insulation: For older homes with solid walls, external or internal insulation can help improve energy efficiency.

Installation Tips:
- Ensure there are no gaps in the insulation material.
- Use a professional installer to guarantee proper application.
- Check and upgrade insulation periodically to maintain efficiency.
Installing Energy-Efficient Windows and Doors
Benefits of Energy-Efficient Windows and Doors
Energy-efficient windows and doors help reduce heat loss, improve comfort, and lower energy bills. They also provide better soundproofing and enhance the overall value of your property.
Types of Energy-Efficient Windows and Doors:
- Double Glazing: Reduces heat loss and noise.
- Triple Glazing: Offers even better insulation and is ideal for colder climates.
- Low-E Glass: Coated with a thin layer that reflects heat back into the room.
- Energy-Efficient Doors: Look for doors with insulated cores and weatherstripping to prevent draughts.
Installation Tips:
- Ensure proper sealing around the frames to prevent air leaks.
- Consider secondary glazing as a more affordable alternative for single-glazed windows.
- Regularly check and replace weatherstripping on doors and windows.
Maintaining HVAC Systems for Peak Performance
Why HVAC Maintenance Matters
Regular maintenance of heating, ventilation, and air conditioning (HVAC) systems ensures they operate efficiently, reducing energy consumption and extending their lifespan.
Key Maintenance Tasks:
- Change Filters Regularly: Dirty filters reduce efficiency and strain the system.
- Inspect Ductwork: Ensure ducts are sealed and insulated to prevent air leaks.
- Schedule Professional Servicing: Annual check-ups by a professional can identify and fix issues before they become major problems.
- Thermostat Management: Use programmable thermostats to optimise heating and cooling schedules.
Energy-Saving Tips:
- Set your thermostat to lower temperatures during winter nights and higher in the summer.
- Consider zoning systems to heat or cool specific areas of your home as needed.
- Upgrade to a high-efficiency HVAC system if your current one is outdated.
Using Energy-Efficient Lighting and Appliances
Benefits of Energy-Efficient Lighting
Switching to energy-efficient lighting, such as LED bulbs, can significantly reduce your electricity consumption and lower your energy bills. LED bulbs use up to 80% less energy than traditional incandescent bulbs and last much longer.

Choosing Energy-Efficient Appliances
Modern appliances are designed to use less energy without compromising performance. Look for appliances with high energy ratings (A++ or A+++).
Tips for Reducing Energy Consumption:
- Lighting:
- Replace incandescent bulbs with LEDs.
- Use motion sensors or timers to turn off lights when not in use.
- Maximise natural light during the day.
- Appliances:
- Unplug devices when not in use to prevent standby power consumption.
- Use energy-saving settings on appliances like washing machines, dishwashers, and refrigerators.
- Regularly maintain appliances to ensure they operate efficiently.
Benefits of Solar Panels and Other Renewable Energy Sources
Why Consider Renewable Energy
Investing in renewable energy sources, such as solar panels, can significantly reduce your reliance on grid electricity, lower your energy bills, and reduce your carbon footprint.
Types of Renewable Energy Systems:
- Solar Panels: Convert sunlight into electricity, providing a sustainable energy source.
- Solar Water Heating: Uses solar energy to heat water, reducing the need for gas or electric water heaters.
- Wind Turbines: Suitable for properties with sufficient wind exposure, converting wind energy into electricity.
Installation Tips:
- Solar Panels:
- Position panels to maximise sun exposure.
- Use a reputable installer to ensure proper setup.
- Consider battery storage systems to store excess energy for use during non-sunny periods.
- Solar Water Heating:
- Install on south-facing roofs for optimal efficiency.
- Regularly maintain the system to ensure peak performance.
Financial Incentives:
- Take advantage of government incentives and grants available for renewable energy installations in the UK.
- Consider the long-term savings and potential increase in property value when investing in renewable energy systems.

Additional Tips for Energy Savings
Smart Home Technology:
Implementing smart home devices can help you monitor and control energy usage more efficiently. Devices such as smart thermostats, energy monitors, and smart plugs can provide valuable insights and automate energy-saving practices.
Draught-Proofing:
Simple measures like draught-proofing doors, windows, and even chimneys can prevent heat loss and improve comfort. Use draught excluders, sealant, or foam strips to block unwanted draughts.
Water Heating:
Consider upgrading to a more efficient water heater or installing a water heater timer to reduce energy consumption. Insulating your water heater and pipes can also help retain heat longer, reducing the need for reheating.
Energy Audits:
Conduct an energy audit to identify areas where your property can improve in energy efficiency. Professional auditors can provide detailed reports and recommendations tailored to your home.
Secret Tips People Don’t Want You to Know
To truly maximise your energy savings, consider these lesser-known tips that can have a surprising impact on your energy bills:
- Thermal Curtains: Invest in thermal curtains to significantly reduce heat loss through windows. They help maintain the indoor temperature by providing an additional layer of insulation.
- Reflective Insulation: Use reflective insulation in the attic to reflect heat back into your home during winter and away from your home during summer, enhancing your existing insulation’s effectiveness.
- Smart Power Strips: Regular power strips can lead to “phantom loads” where electronics consume power even when turned off. Smart power strips can cut off power completely, reducing unnecessary energy usage.
- Rearrange Furniture: Ensure your radiators and vents are not obstructed by furniture. This allows for better air circulation and more efficient heating and cooling.
- Seal Electrical Outlets: Electrical outlets on exterior walls can be a source of drafts. Use outlet sealers to block unwanted airflow and improve insulation.
Conclusion
Saving on energy bills with smart property maintenance is achievable with a combination of upgrades, regular maintenance, and adopting green practices. By insulating your home, installing energy-efficient windows and doors, maintaining your HVAC systems, using energy-efficient lighting and appliances, and considering renewable energy sources, you can significantly reduce your energy consumption and costs. For more personalised advice and professional maintenance services, visit Wrestore.
By implementing these strategies, you can achieve substantial savings on your energy bills while contributing to a greener environment. Smart property maintenance not only enhances the efficiency of your home but also increases its value and comfort for years to come.
Electrical problems in homes can be both a nuisance and a safety hazard. From flickering lights to tripped circuit breakers, these issues can disrupt your daily life and potentially cause serious damage if not addressed promptly. This guide will help you identify common electrical problems, understand how to fix them safely, and know when to call in a professional.
Identification of Common Electrical Issues
Tripped Circuit Breakers and Blown Fuses
What They Are:
Circuit breakers and fuses are safety devices designed to protect your home’s electrical system from overloads and short circuits. When too much electricity flows through the wires, these devices “trip” or “blow” to cut off the power, preventing potential damage and fires.
How to Fix:
- Locate the Electrical Panel: Typically found in basements, garages, or utility rooms.
- Identify the Tripped Breaker or Blown Fuse: Look for a breaker in the “off” position or a fuse with a broken wire inside the glass.
- Reset the Breaker or Replace the Fuse:
- For breakers: Flip the tripped breaker to the “off” position, then back to the “on” position.
- For fuses: Unscrew the blown fuse and replace it with one of the same amperage.
When to Call a Professional: If the breaker trips or the fuse blows repeatedly, this could indicate a more serious electrical issue that needs professional attention.
Flickering Lights and What They Indicate
What They Are:
Flickering lights can be caused by several factors, ranging from simple issues like loose bulbs to more complex problems like faulty wiring or overloaded circuits.
How to Fix:
- Check the Bulbs: Ensure bulbs are securely screwed in.
- Inspect Light Fixtures: Loose wiring within the fixture can cause flickering. Turn off the power and tighten any loose connections.
- Check the Circuit: Flickering can also occur if the circuit is overloaded. Reduce the load by unplugging some devices.
When to Call a Professional: If flickering persists after these checks, it could indicate a problem with the wiring or the electrical panel, requiring professional assessment.
Electrical Surges and Protection Strategies
What They Are:
Electrical surges are sudden increases in voltage that can damage electronic devices and appliances. They can be caused by lightning strikes, power outages, or faulty appliances.
How to Fix:
- Install Surge Protectors: Use surge protectors for valuable electronics and appliances.
- Check Wiring and Outlets: Loose or faulty wiring can cause surges. Inspect and repair any visible issues.
- Unplug Devices During Storms: During lightning storms, unplug sensitive electronics to protect them from surges.
When to Call a Professional: If you experience frequent surges, a professional electrician should inspect your home’s electrical system to identify and fix the root cause.
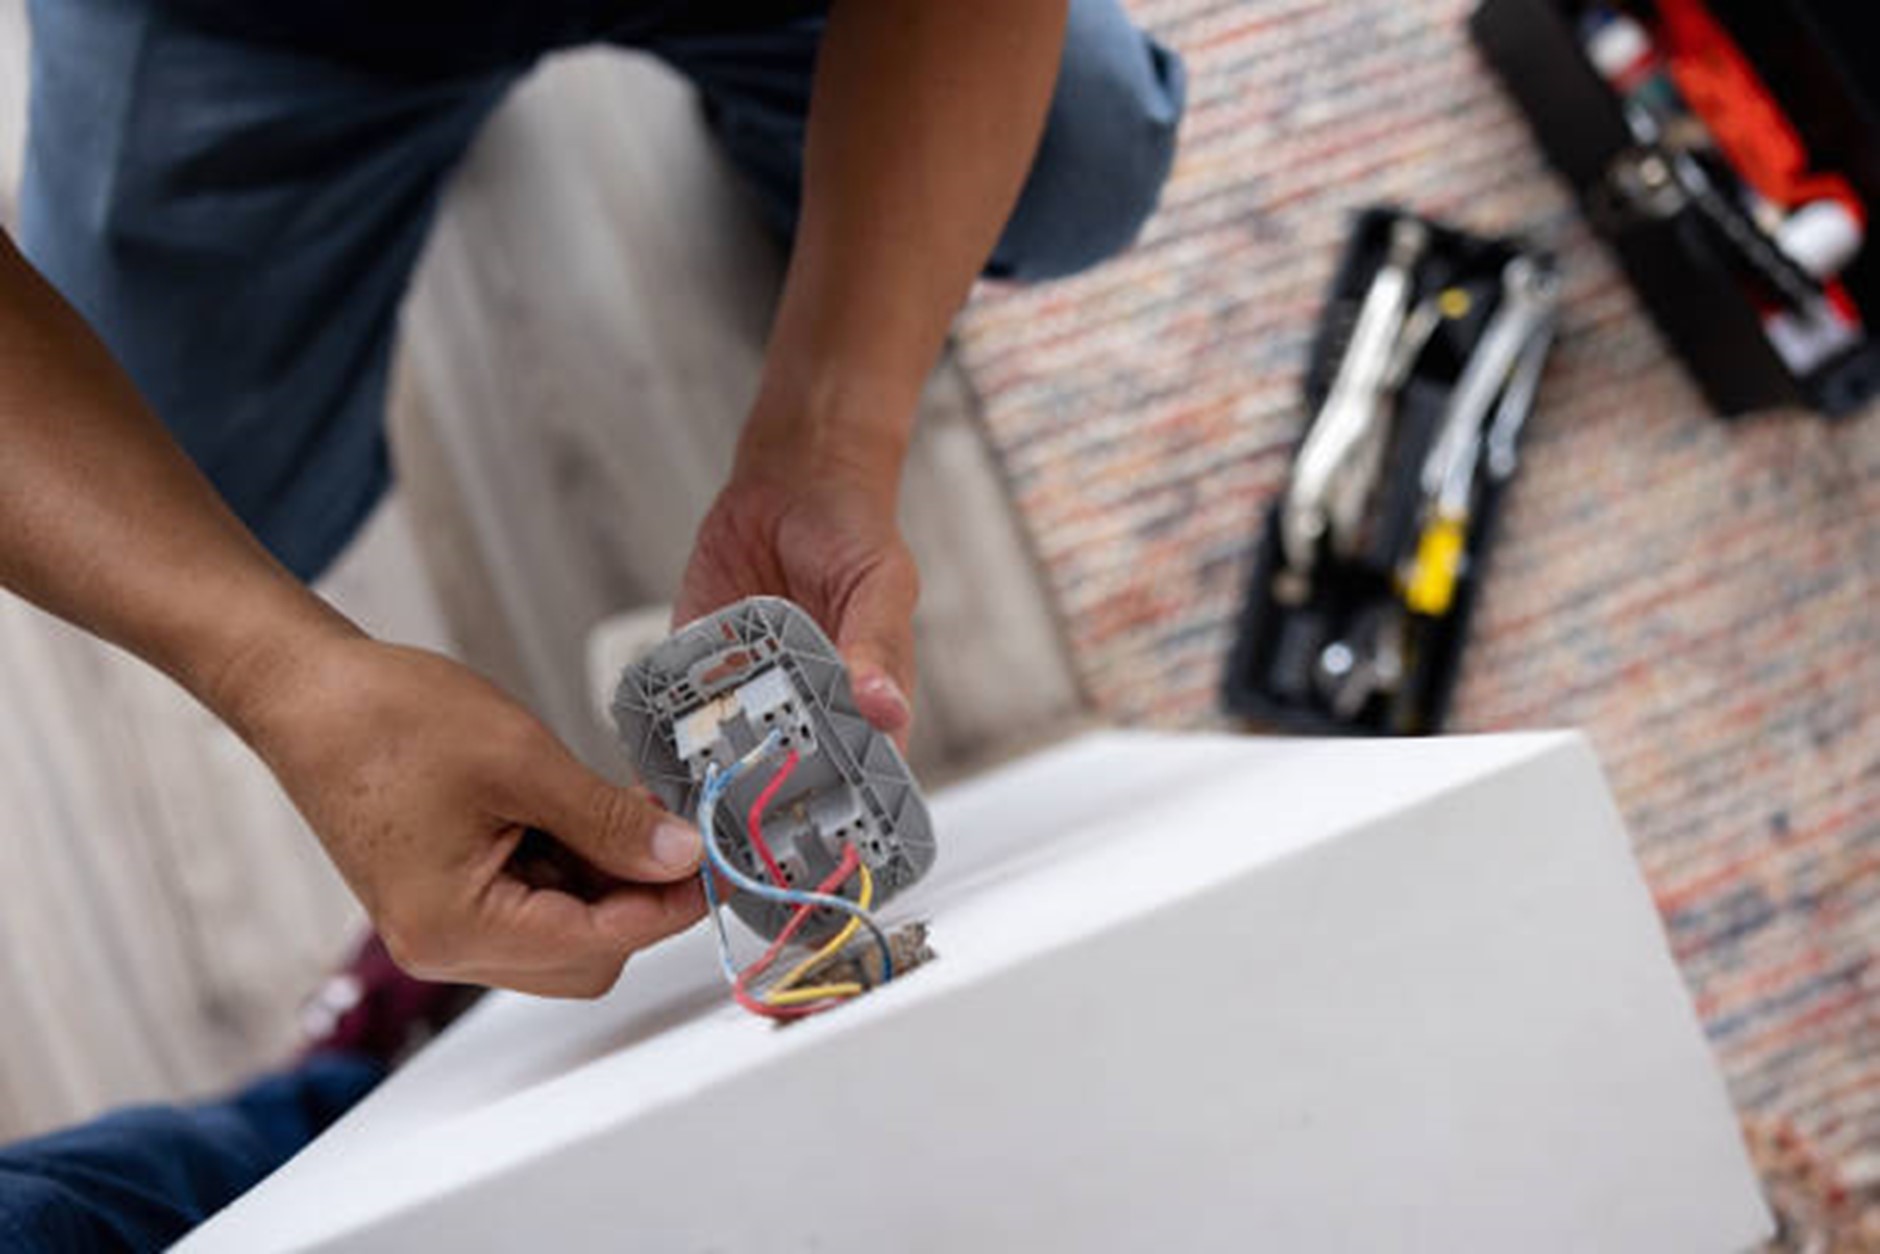
Faulty Wiring and Outlet Issues
What They Are:
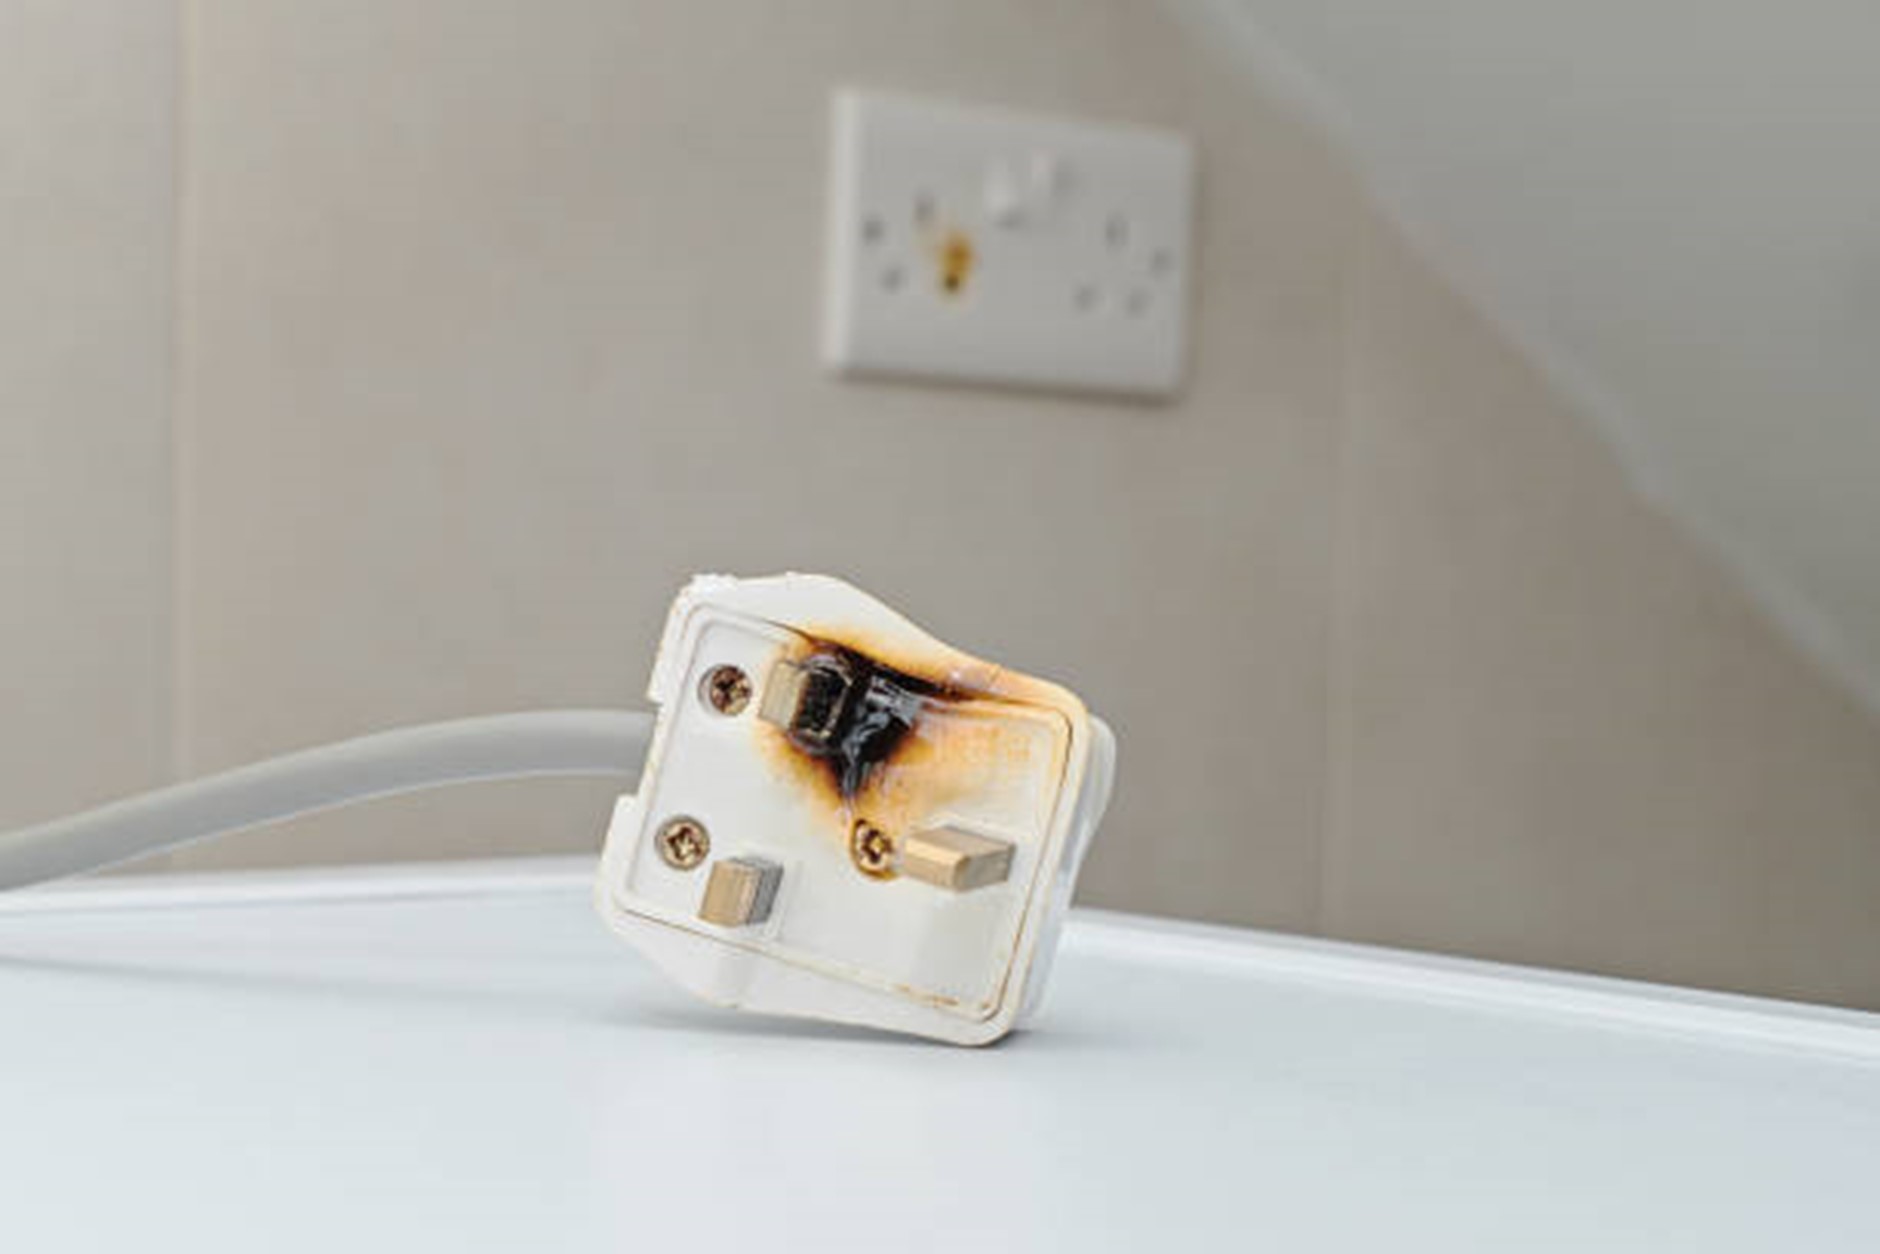
Faulty wiring and outlets can lead to a variety of problems, including power outages, sparks, and even electrical fires. Common signs of faulty wiring include discolored outlets, a burning smell, or outlets that feel warm to the touch.
How to Fix:
- Inspect Outlets: Check for discoloration, warmth, or burning smells. Replace any damaged outlets.
- Tighten Connections: Loose wiring can cause issues. Turn off the power and tighten any loose connections within outlets or fixtures.
- Upgrade Wiring: Older homes may have outdated wiring that can’t handle modern electrical loads. Consider upgrading the wiring to a safer, more efficient system.
When to Call a Professional: For major wiring issues or if you’re unsure about handling electrical repairs, always call a licensed electrician. Working with electricity can be dangerous, and professional expertise ensures the job is done safely and correctly.
Overloaded Circuits and Power Strips
What They Are:
Overloaded circuits occur when too many devices draw power from a single circuit, causing the breaker to trip. This is a common problem in homes with many high-power appliances or electronics.
How to Fix:
- Redistribute Devices: Move some devices to other circuits to balance the load.
- Use Power Strips Wisely: Ensure power strips are not overloaded and are equipped with surge protection.
- Upgrade Electrical Panel: If your home frequently experiences overloaded circuits, consider upgrading the electrical panel to handle higher loads.
When to Call a Professional: If redistributing devices and using power strips do not solve the problem, a professional electrician can assess your home’s electrical capacity and suggest upgrades.
Dead Outlets
What They Are:
Dead outlets are outlets that no longer provide power. This can be caused by a tripped breaker, a blown fuse, or faulty wiring.
How to Fix:
- Check the Circuit Breaker: Ensure the breaker associated with the outlet is not tripped.
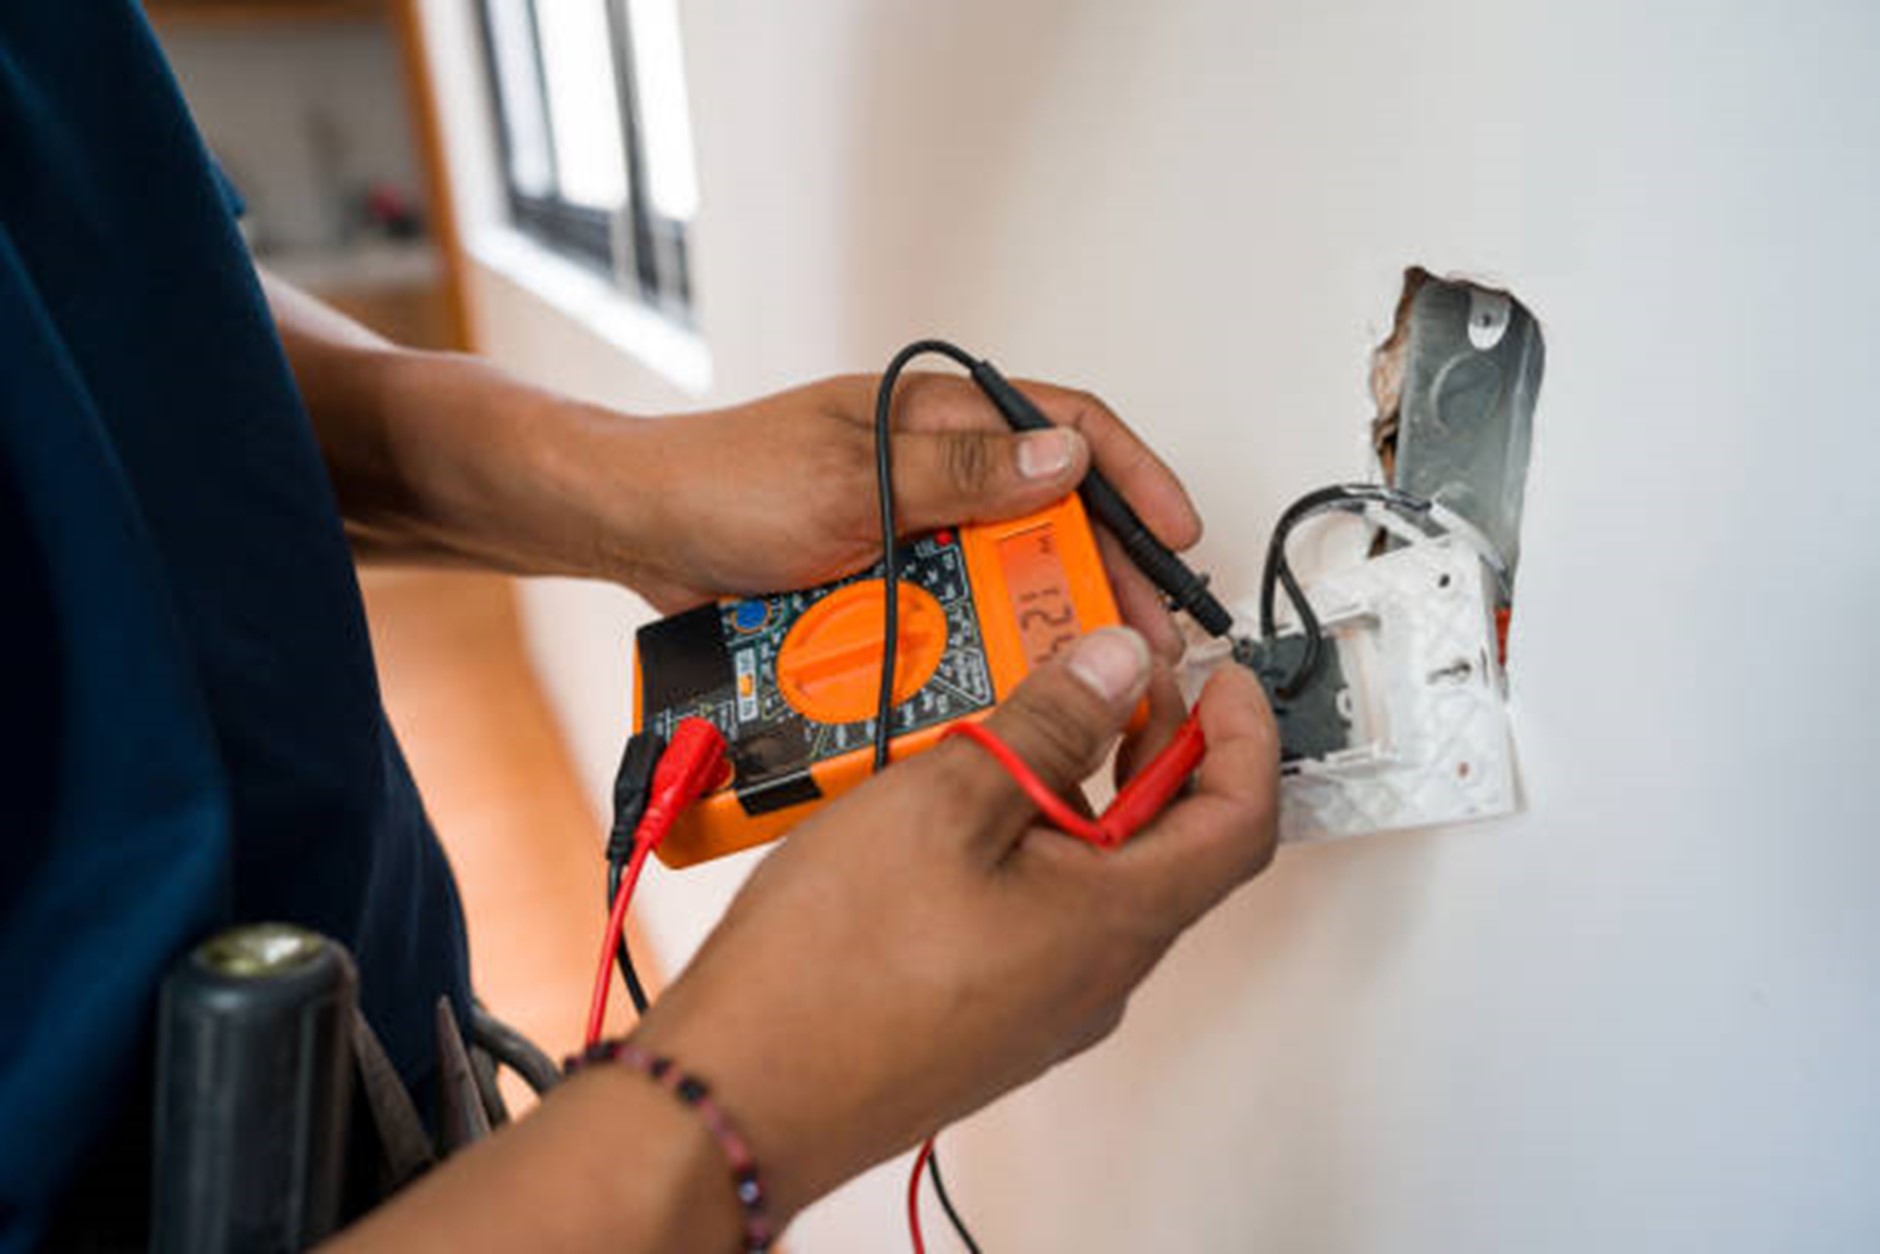
- Test the Outlet: Use a multimeter to check if the outlet is receiving power.
- Replace the Outlet: If the outlet is still dead, turn off the power and replace it.
When to Call a Professional: If multiple outlets are dead or if you suspect wiring issues, it’s best to have a professional electrician inspect your home.
Light Switches Not Working
What They Are:
Light switches that do not turn lights on or off can be frustrating and indicate underlying electrical issues.
How to Fix:
- Check the Bulb: Ensure the bulb is not burned out.
- Inspect the Switch: Turn off the power and check the wiring connections inside the switch.
- Replace the Switch: If the wiring is intact but the switch does not work, replace it.
When to Call a Professional: If replacing the switch does not resolve the issue, there may be a problem with the wiring that requires professional attention.
Burning Smell or Sparks
What They Are:
A burning smell or sparks from outlets or switches is a serious warning sign of electrical problems. This can indicate overheating, short circuits, or faulty wiring.
How to Fix:
- Turn Off the Power: Immediately turn off the power to the affected area at the electrical panel.
- Inspect the Outlet or Switch: Check for visible damage or loose connections.
- Replace Damaged Components: Replace any damaged outlets, switches, or wiring.
When to Call a Professional: Always call a professional electrician if you notice a burning smell or sparks. These signs can indicate serious hazards that need expert intervention.
Safety Tips for Working with Electricity
Basic Safety Precautions:
- Turn Off the Power: Always turn off the power at the electrical panel before starting any repair.
- Use Insulated Tools: Use tools with insulated handles to reduce the risk of electric shock.
- Wear Protective Gear: Use safety goggles and gloves to protect yourself from injury.
- Test for Live Wires: Use a voltage tester to ensure no electricity is flowing through wires before touching them.
- Keep Water Away: Never work with electricity in wet conditions or with wet hands.
When to DIY and When to Call a Professional:
DIY Projects:
- Replacing light bulbs and fixtures.
- Resetting circuit breakers and replacing fuses.
- Installing surge protectors.
Professional Projects:
- Rewiring parts of your home.
- Installing or upgrading electrical panels.
- Diagnosing persistent electrical issues.
Conclusion
Understanding common electrical problems and knowing how to fix them can help you maintain a safe and efficient home. However, safety should always be your top priority. For simple tasks like replacing bulbs and resetting breakers, DIY solutions are often sufficient. But for more complex issues like frequent surges, persistent flickering lights, and faulty wiring, it’s crucial to call a professional electrician.
Boost Your Home’s Value: 7 Easy Upgrades That Pay Off Big Time
If you’re looking to boost your home’s value, whether for an upcoming sale or simply to improve your living space, focusing on strategic upgrades can offer a significant return on investment. Many homeowners think that increasing property value requires extensive renovations, but there are several easy and cost-effective upgrades that can make a substantial difference. This guide will walk you through seven impactful improvements, from energy-efficient upgrades to smart home technologies, to enhance both the value and functionality of your home.
1. Upgrade to Energy-Efficient Windows and Doors
Why It Matters:
Energy-efficient windows and doors are one of the most effective ways to increase your home’s value. They not only enhance the aesthetic appeal of your home but also provide significant energy savings. This upgrade can reduce energy bills by improving insulation, keeping your home warmer in the winter and cooler in the summer.
Types of Energy-Efficient Windows and Doors:
- Double Glazing: Reduces heat loss and noise.
- Triple Glazing: Offers superior insulation, especially in colder climates.
- Low-E Glass: Coated with a thin layer that reflects heat back into the room.
- Energy-Efficient Doors: Insulated cores and proper weatherstripping to prevent drafts.
Benefits:
- Lower energy bills.
- Increased comfort.
- Improved curb appeal.
- Higher resale value.
Installation Tips:
- Ensure professional installation to maximize efficiency.
- Look for Energy Star-rated products.
- Regularly check and replace weatherstripping to maintain efficiency.

2. Install Smart Home Technology
Why It Matters:
Smart home technology is rapidly becoming a must-have feature for modern homes. These technologies enhance convenience, security, and energy efficiency, making your home more attractive to potential buyers.
Popular Smart Home Upgrades:
- Smart Thermostats: Automatically adjust the temperature for optimal energy savings.
- Smart Lighting: Control lights remotely and set schedules to save energy.
- Security Systems: Smart locks, cameras, and alarms improve home security.
- Voice Assistants: Devices like Amazon Alexa and Google Home can control various smart devices.
Benefits:
- Increased energy efficiency.
- Enhanced home security.
- Improved convenience and control.
- Modern, tech-savvy appeal.
Installation Tips:
- Choose compatible devices to ensure seamless integration.
- Consider professional installation for complex systems.
- Regularly update software to maintain security and functionality.

3. Enhance Curb Appeal with Landscaping
Why It Matters:
First impressions matter, and your home’s exterior is the first thing potential buyers see. Enhancing your landscaping can significantly boost curb appeal and, in turn, your home’s value.
Easy Landscaping Upgrades:
- Plant Trees and Shrubs: Add greenery to create a welcoming atmosphere.
- Maintain the Lawn: Regular mowing, edging, and fertilizing.
- Add Mulch: Use mulch in flower beds to retain moisture and improve appearance.
- Install Pathways: Stone or gravel paths can add charm and functionality.
- Outdoor Lighting: Highlight key areas with landscape lighting.
Benefits:
- Improved first impressions.
- Increased property value.
- Enhanced outdoor living space.
- Better environmental impact.
Installation Tips:
- Choose native plants that require less water and maintenance.
- Plan for year-round appeal with a mix of evergreen and seasonal plants.
- Use sustainable landscaping practices.

4. Upgrade the Kitchen and Bathroom
Why It Matters:
Kitchens and bathrooms are key areas that potential buyers scrutinize. Upgrading these spaces can provide a high return on investment and significantly enhance your home’s appeal.
Kitchen Upgrades:
- New Appliances: Energy-efficient models with modern features.
- Countertops: Upgrade to granite, quartz, or other durable materials.
- Cabinet Refacing: Give cabinets a fresh look without replacing them entirely.
- Backsplash: Add a stylish and easy-to-clean backsplash.
Bathroom Upgrades:
- Fixtures: Replace old fixtures with modern, water-efficient models.
- Vanity: Install a new vanity with ample storage.
- Tiles: Update floor and wall tiles for a fresh look.
- Lighting: Improve lighting for functionality and ambiance.
Benefits:
- Increased home value.
- Enhanced functionality and aesthetics.
- Better energy and water efficiency.
- Greater buyer appeal.
Installation Tips:
- Prioritize high-impact, cost-effective changes.
- Consider DIY projects where feasible to save costs.
- Ensure proper ventilation in bathrooms to prevent mold and mildew.
5. Add Fresh Paint and New Flooring
Why It Matters:
A fresh coat of paint and updated flooring can transform your home’s look and feel, making it more appealing to potential buyers. These upgrades are relatively easy and inexpensive but offer significant returns.
Painting Tips:
- Choose Neutral Colors: Appeal to a broader range of buyers.
- High-Quality Paint: Use durable, washable paint for long-lasting results.
- Accent Walls: Add visual interest without overwhelming the space.
Flooring Options:
- Hardwood: Classic and durable, a favorite among buyers.
- Laminate: Cost-effective and stylish, mimics the look of wood.
- Vinyl Plank: Waterproof and easy to maintain, great for high-traffic areas.
- Carpet: Soft and warm, ideal for bedrooms and living areas.
Benefits:
- Fresh, updated look.
- Increased home value.
- Better durability and maintenance.
- Enhanced buyer appeal.
Installation Tips:
- Prepare surfaces properly for a smooth paint finish.
- Hire professionals for floor installation if needed.
- Choose flooring that complements your home’s style and needs.

6. Improve Energy Efficiency
Why It Matters:
Energy-efficient homes are increasingly in demand due to rising energy costs and environmental concerns. Making your home more energy-efficient can attract eco-conscious buyers and lower utility bills.
Energy-Efficient Upgrades:
- Insulation: Upgrade attic, wall, and floor insulation to reduce heat loss.
- Windows and Doors: Replace old windows and doors with energy-efficient models.
- Solar Panels: Install solar panels to generate renewable energy.
- Water Heaters: Upgrade to a tankless or energy-efficient water heater.
Benefits:
- Lower energy bills.
- Increased home value.
- Reduced environmental impact.
- Enhanced comfort.
Installation Tips:
- Conduct an energy audit to identify areas for improvement.
- Use high-quality materials and certified professionals for installations.
- Take advantage of government incentives for energy-efficient upgrades.
7. Add Functional Outdoor Living Spaces
Why It Matters:
Outdoor living spaces are highly desirable, especially during warmer months. Creating functional outdoor areas can extend your living space and increase your home’s value.
Outdoor Living Upgrades:
- Deck or Patio: Build or upgrade a deck or patio for outdoor entertaining.
- Outdoor Kitchen: Install a grill, sink, and countertop for outdoor cooking.
- Fire Pit: Create a cozy gathering spot for family and friends.
- Seating Areas: Add comfortable seating with weather-resistant furniture.
Benefits:
- Enhanced outdoor enjoyment.
- Increased property value.
- Greater appeal to buyers.
- Additional functional space.
Installation Tips:
- Use durable, weather-resistant materials.
- Consider professional design and installation for complex projects.
- Incorporate shade and lighting for comfort and usability.
Conclusion
Investing in these seven easy upgrades can significantly boost your home’s value and appeal. Whether you plan to sell your home soon or simply want to enjoy the benefits of a more comfortable and efficient living space, these improvements offer excellent returns. From energy-efficient windows and smart home technology to fresh paint and upgraded kitchens, these strategic changes can make a substantial difference. For more personalized advice and professional maintenance services, visit Wrestore.
By implementing these upgrades, you can enhance your home’s functionality, efficiency, and overall appeal, ensuring it stands out in the competitive property market. Whether you opt for simple DIY projects or seek professional assistance, these improvements are sure to pay off big time.
10 Signs You Need to Call a Handyman Right Now (And What Happens If You Don’t)
Introduction
Maintaining a home involves numerous tasks, some of which can be managed on your own. However, certain signs indicate it’s time to call in a professional handyman. Ignoring these signs can lead to significant problems, increased costs, and potential safety hazards. Here are the top 10 signs you need to call a handyman right now and what could happen if you don’t.
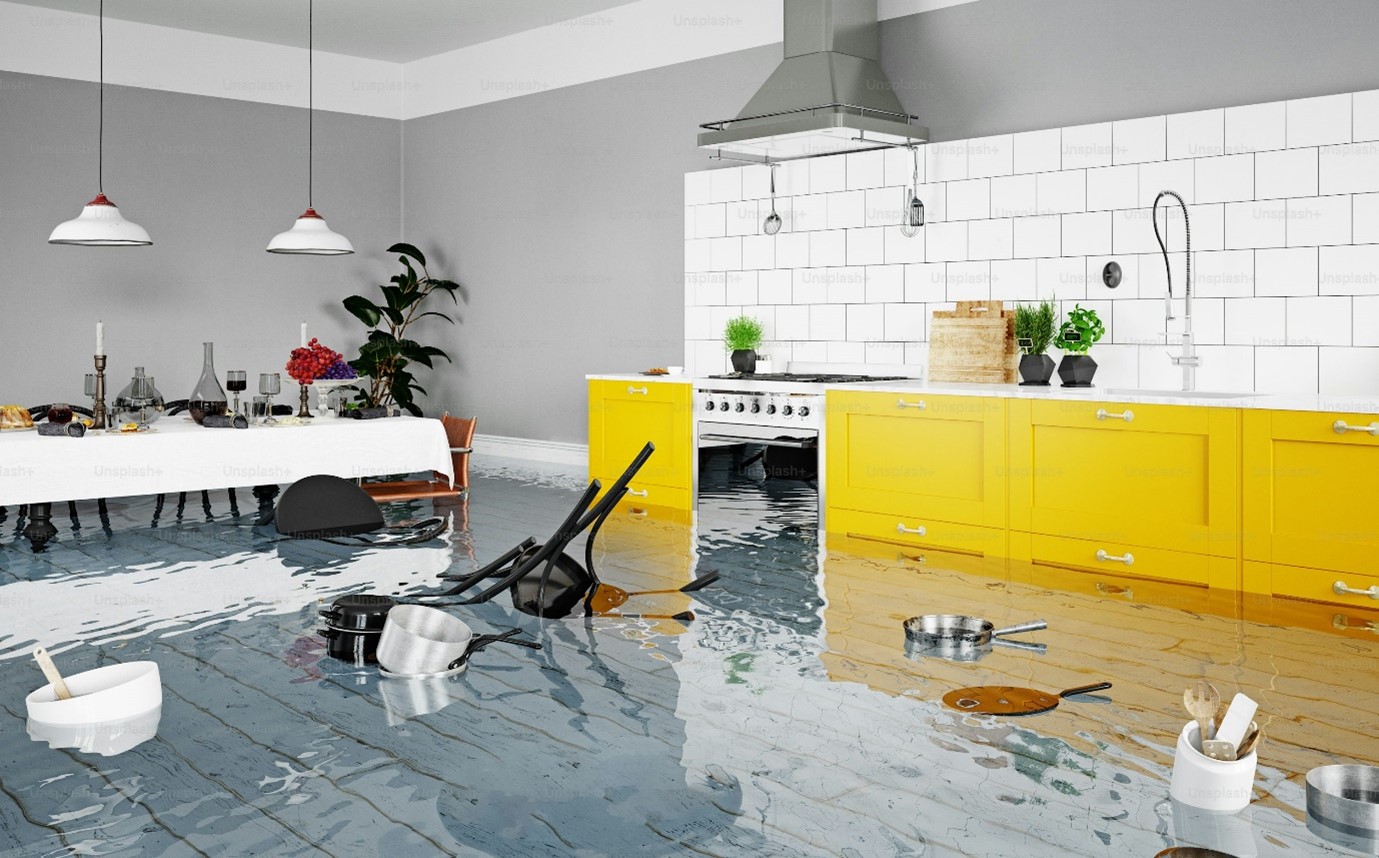
1. Persistent Leaks
A small leak might seem like a minor issue, but persistent leaks can lead to severe water damage, mold growth, and structural problems.
Signs of Persistent Leaks:
- Stains on Walls or Ceilings: Discoloration indicates water seepage.
- Damp or Musty Smell: Moisture promotes mold growth, which can affect air quality.
- Increased Water Bills: A sudden spike in your water bill can indicate hidden leaks.
Consequences of Ignoring Leaks:
- Mold Growth: Can cause health issues like allergies and respiratory problems.
- Structural Damage: Water can weaken foundations and cause wood rot.
- Increased Repair Costs: Delaying repairs can lead to more extensive and expensive damage.
2. Electrical Issues
Electrical problems pose a significant risk and should be addressed immediately by a professional.
Signs of Electrical Issues:
- Frequent Circuit Breaker Trips: Indicates an overloaded circuit.
- Flickering Lights: Could be a sign of loose wiring.
- Burning Smell or Scorched Outlets: Indicates overheating or electrical faults.
Consequences of Ignoring Electrical Issues:
- Fire Hazard: Faulty wiring can lead to electrical fires.
- Damage to Appliances: Electrical surges can damage household electronics.
- Injury or Death: Electric shocks can cause serious injury or be fatal.
3. Peeling Paint or Wallpaper
Peeling paint or wallpaper can be a sign of underlying issues such as moisture problems or poor ventilation.
Signs to Watch For:
- Bubbling or Blistering Paint: Indicates moisture trapped beneath the surface.
- Peeling Wallpaper: Often a sign of humidity or water damage.
Consequences of Ignoring Peeling Paint or Wallpaper:
- Further Deterioration: The problem will only get worse over time.
- Mold Growth: Moisture behind walls can lead to mold.
- Decreased Property Value: Aesthetic issues can reduce your home’s market value.
4. Cracked or Missing Caulk
Caulk seals out moisture and air, and when it deteriorates, it can lead to a variety of issues.
Signs of Deteriorating Caulk:
- Cracks and Gaps: Visible gaps in caulk lines around windows, doors, and bathrooms.
- Drafts: Feeling cold air around windows or doors.
Consequences of Ignoring Cracked or Missing Caulk:
- Water Damage: Unsealed gaps can let in water, causing damage.
- Higher Energy Bills: Drafts can increase heating and cooling costs.
- Pest Infestation: Gaps can allow insects and rodents to enter.

5. Sagging Floors
Sagging or uneven floors are a sign of structural issues that require immediate attention.
Signs of Sagging Floors:
- Noticeable Slope: Floors that visibly slope or bounce when walked on.
- Gaps Between Floor and Baseboard: Indicate shifting or settling.
Consequences of Ignoring Sagging Floors:
- Structural Weakness: Can lead to more severe structural problems.
- Safety Hazards: Increased risk of tripping and injury.
- Costly Repairs: Delaying repairs can lead to major renovation costs.
6. Sticking Windows or Doors
Windows and doors that are difficult to open or close can indicate foundational issues or swelling due to moisture.
Signs of Sticking Windows or Doors:
- Hard to Open or Close: Sticking or jamming.
- Gaps When Closed: Indicating warping or misalignment.
Consequences of Ignoring Sticking Windows or Doors:
- Increased Energy Bills: Poorly sealed doors and windows affect insulation.
- Security Risk: Windows and doors that don’t close properly are a security concern.
- Structural Issues: May indicate foundation problems that need addressing.
7. Loose or Broken Tiles
Loose or broken tiles in the bathroom or kitchen can be a sign of water damage or poor installation.
Signs of Tile Problems:
- Cracked or Broken Tiles: Visible damage on tiles.
- Loose Tiles: Tiles that move or shift underfoot.
Consequences of Ignoring Loose or Broken Tiles:
- Water Damage: Gaps can let water seep through, damaging underlying structures.
- Injury Risk: Loose tiles can cause tripping or cuts.
- Increased Repair Costs: Delayed repairs can lead to more extensive tile replacement.

8. Clogged Gutters
Clogged gutters can lead to a variety of problems, including water damage and foundation issues.
Signs of Clogged Gutters:
- Overflowing Water: Water spilling over the sides during rain.
- Sagging Gutters: Indicates excess weight from debris.
Consequences of Ignoring Clogged Gutters:
- Foundation Damage: Overflowing water can erode the foundation.
- Roof Damage: Water can seep under shingles and cause rot.
- Pest Infestation: Standing water can attract insects and rodents.
9. Faulty Smoke or Carbon Monoxide Detectors
Smoke and carbon monoxide detectors are crucial for home safety, and they need to be in working order at all times.
Signs of Faulty Detectors:
- Frequent False Alarms: Detectors going off without cause.
- No Response During Tests: Detectors fail to beep when tested.
- Chirping Sounds: Indicates low battery or malfunction.
Consequences of Ignoring Faulty Detectors:
- Increased Risk of Fire: Without working smoke detectors, fires may not be detected early.
- Carbon Monoxide Poisoning: Faulty CO detectors can’t warn you of dangerous gas leaks.
- Legal Issues: Many regions require working detectors for rental properties.
10. Deteriorating Decks or Patios
Decks and patios exposed to the elements can deteriorate over time, posing safety risks.
Signs of Deterioration:
- Wood Rot: Soft or discolored wood.
- Loose Railings or Boards: Wobbly railings or boards that move underfoot.
Consequences of Ignoring Deteriorating Decks or Patios:
- Safety Hazards: Increased risk of collapse or injury.
- Increased Repair Costs: Delaying maintenance can lead to extensive repairs.
- Reduced Usability: A deteriorating deck or patio can limit outdoor enjoyment.

Conclusion
Recognizing the signs that you need to call a handyman can save you time, money, and stress. Ignoring these issues can lead to more severe problems and increased repair costs. At Wrestore, we offer professional handyman services to address all your home maintenance needs promptly and efficiently. Don’t wait for minor issues to become major problems—contact Wrestore today for reliable and high-quality home maintenance solutions.
FAQs
Why should I address persistent leaks immediately?
Persistent leaks can lead to mold growth, structural damage, and increased repair costs if not addressed promptly.
What are the dangers of ignoring electrical issues?
Ignoring electrical issues can result in fire hazards, damage to appliances, and potential injury or death from electric shocks.
How can peeling paint or wallpaper indicate a problem?
Peeling paint or wallpaper can be a sign of moisture problems or poor ventilation, leading to further deterioration and mold growth.
Why is it important to replace cracked or missing caulk?
Cracked or missing caulk can allow water and air to enter, causing water damage, higher energy bills, and pest infestations.
What does a sagging floor indicate?
Sagging floors are a sign of structural issues that need immediate attention to prevent further damage and ensure safety.
What problems can arise from sticking windows or doors?
Sticking windows and doors can increase energy bills, pose security risks, and indicate potential foundation problems.
Why should loose or broken tiles be repaired?
Loose or broken tiles can lead to water damage, injury risks, and increased repair costs if not addressed promptly.
What are the risks of clogged gutters?
Clogged gutters can cause foundation damage, roof damage, and pest infestations due to standing water.
Why is it crucial to have working smoke and carbon monoxide detectors?
Working detectors are essential for detecting fires and carbon monoxide leaks, ensuring home safety and compliance with legal requirements.
What are the consequences of ignoring deteriorating decks or patios?
Ignoring deteriorating decks or patios can result in safety hazards, increased repair costs, and reduced outdoor usability.
Leak detection is an essential aspect of maintaining UK homes and apartments. With the country’s variable climate, aging infrastructure, and rising water and energy costs, undetected leaks can lead to significant financial burdens, property damage, and health hazards. This comprehensive guide explores the causes, detection methods, technologies, and preventive measures for managing leaks in residential properties across the UK.
Why Leak Detection Matters
Leak detection is crucial for several reasons:
Cost Savings: Water and gas leaks can significantly increase utility bills. Identifying and fixing leaks promptly can save homeowners and tenants considerable amounts of money.
Property Protection: Water leaks can cause severe damage to a property’s structure, including walls, floors, and foundations. Gas leaks pose safety risks, including fire hazards and explosions.
Health and Safety: Damp environments from water leaks promote mold growth, which can lead to respiratory issues and other health problems. Gas leaks can lead to carbon monoxide poisoning, which is potentially fatal.
Environmental Impact: Water wastage due to leaks contributes to the depletion of natural water resources. Efficient leak detection helps conserve water, a vital resource.
Common Causes of Leaks in UK Homes
Understanding the common causes of leaks can aid in their prevention and early detection. The primary causes include:
Aging Infrastructure: Many UK homes have old plumbing systems. Over time, pipes can corrode or degrade, leading to leaks.
Weather Conditions: The UK’s variable weather, including freezing temperatures in winter, can cause pipes to expand and contract, leading to cracks and leaks.
Poor Installation: Inadequately installed pipes and fittings can become loose or fail, resulting in leaks.
High Water Pressure: Excessively high water pressure can stress pipes and joints, causing them to burst or leak.
Wear and Tear: Everyday use can lead to wear and tear on appliances and fixtures, such as washing machines, dishwashers, and toilets, which can develop leaks over time.
Leak Detection Techniques for UK Homes
There are various techniques and tools available for detecting leaks in homes and apartments. Here’s an overview of the most effective methods:
Visual Inspection
Visual inspection is the simplest method to detect leaks. Regularly checking visible pipes, appliances, and fixtures can help identify signs of leaks, such as:
Water stains on walls, ceilings, or floors.
Damp or musty odors.
Visible mold or mildew growth.
Unexplained puddles or wet spots.
While this method is straightforward, it may not detect hidden or small leaks.
Water Meter Monitoring
Monitoring your water meter can help detect leaks. Here’s how:
Turn off all water fixtures and appliances.
Note the water meter reading.
Wait for a couple of hours without using any water.
Check the meter again. If the reading has changed, there may be a leak.
This method is effective for detecting significant leaks but may not identify very small leaks
Acoustic Leak Detection
Acoustic leak detection involves using specialized devices to listen for the sound of water escaping from pipes. Professional plumbers often use this method to pinpoint the exact location of a leak. It’s particularly useful for detecting leaks in walls, floors, or underground pipes.
Thermal Imaging
Thermal imaging cameras detect temperature variations caused by leaks. Water leaks often create cool spots, while gas leaks can create warm spots. This non-invasive method is useful for detecting hidden leaks behind walls and under floors.
Dye Testing
Dye testing involves adding a non-toxic dye to the water system and checking if it appears in areas where it shouldn’t, such as around toilets, sinks, or bathtubs. This method helps identify leaks in specific fixtures and appliances.
Smart Leak Detectors
Smart leak detectors are devices that can be installed in various parts of your home to monitor for leaks. They often come with sensors that detect water, changes in humidity, or even temperature variations. Many smart leak detectors can send alerts to your smartphone, enabling you to act quickly.
Advanced Leak Detection Technologies
With technological advancements, several innovative leak detection methods have emerged, offering enhanced accuracy and reliability.
Fiber Optic Sensing
Fiber optic sensing involves embedding fiber optic cables along pipelines. These cables detect changes in temperature, strain, and acoustics, indicating a leak’s presence and location.
Distributed Temperature Sensing (DTS): Monitors temperature changes along the pipeline.
Distributed Acoustic Sensing (DAS): Detects acoustic signals associated with leaks.
Fiber optic sensing provides continuous monitoring and can detect leaks in real-time, making it ideal for critical infrastructure.
Smart Water Meters
Smart water meters are equipped with advanced sensors and communication technology to detect leaks in residential and commercial plumbing systems. These meters provide real-time data on water usage and can alert users to potential leaks.
Flow Sensors: Monitor water flow rates and detect anomalies.
Pressure Sensors: Detect pressure drops associated with leaks.
Smart water meters empower consumers to monitor their water usage and address leaks promptly, reducing water wastage and associated costs.
Satellite Leak Detection
Satellite leak detection uses satellite imagery and remote sensing technology to detect leaks in large-scale water and oil pipelines. Satellites equipped with specialized sensors can identify changes in soil moisture, temperature, and vegetation health, indicating potential leaks.
Synthetic Aperture Radar (SAR): Detects ground deformation caused by leaks.
Multispectral Imaging: Identifies changes in vegetation health due to leaks.
Satellite leak detection is effective for monitoring extensive pipeline networks, particularly in remote or inaccessible areas.
Practical Tips for Leak Prevention and Management
Regular Inspections: Conduct regular inspections of your plumbing system, especially if your home is older. Check for signs of wear and tear, corrosion, or damage.
Insulate Pipes: In colder months, insulate exposed pipes to prevent them from freezing and bursting.
Monitor Water Pressure: Ensure that your home’s water pressure is within a safe range. High pressure can damage pipes and fixtures. Installing a pressure regulator can help maintain optimal pressure levels.
Maintain Appliances: Regularly maintain and inspect household appliances like washing machines, dishwashers, and water heaters. Replace old or worn-out hoses and fittings.
Install Leak Detectors: Invest in smart leak detectors for high-risk areas such as basements, kitchens, and bathrooms. These devices provide early warnings and can help prevent major damage.
Know Your Stopcock: Ensure you know the location of your stopcock (or main water valve) and how to operate it. In case of a major leak, turning off the water supply quickly can prevent extensive damage.
Educate Residents: If you live in an apartment or shared housing, educate all residents about the signs of leaks and the importance of reporting them promptly.
Case Studies: Successful Leak Detection in UK Homes
Case Study 1 Leak Detection Kennington: Victorian Terrace
A Victorian terrace house in London experienced damp patches on the walls and ceiling. After a thorough visual inspection and using a moisture meter, the homeowner discovered a hidden leak in the roof. The leak was promptly repaired, preventing further damage and reducing the risk of mold growth.
Case Study 2 Leak Detection Knightsbridge: Modern Apartment
Residents of a modern apartment complex in London noticed unusually high water bills. The property management installed smart water meters in each unit. The meters detected a slow leak in one apartment’s bathroom. Early detection and repair saved the tenant from potential water damage and reduced the overall water consumption for the building.
Case Study 3 Leak Detection Hampstead: Cottage
A cottage in the Hampstead had an old plumbing system prone to leaks. During a routine inspection, a plumber used acoustic leak detection equipment to identify a leak in an underground pipe. The leak was fixed before it could cause significant damage to the property’s foundation.

Conclusion
Leak detection is a critical aspect of maintaining the integrity and safety of UK homes and apartments. With advancements in technology, detecting leaks has become more precise and efficient. By understanding the causes of leaks, employing a range of detection techniques, and implementing proactive management practices, you can safeguard your property, protect the environment, and ensure the health and safety of your household.
Investing in the right tools and technologies, training your team, and staying vigilant through regular inspections are essential steps in effective leak detection and prevention. As we move towards smarter and more connected infrastructure, the role of innovative leak detection methods will continue to grow, making our systems more resilient and sustainable.
Whether you are managing a municipal water network, an industrial facility, or a residential property, this comprehensive guide to leak detection provides the knowledge and insights needed to address leaks effectively and maintain the integrity of your systems.
At Wrestore our plumbers have all the experience and tools needed to find and address any leaks you may have. Please do get in contact with one of the team for plumbing services near me now on 0207 183 2771 via call or whats app or chat to us online through our website

Water is essential for life, but when it infiltrates your home, it can cause significant damage. Waterproofing your home is a critical step in protecting your property from the detrimental effects of moisture, such as mould growth, structural damage, and decreased property value. Whether you’re dealing with a damp basement, leaky roof, or moisture-prone walls, implementing effective waterproofing methods can save you time, money, and stress in the long run.
In this comprehensive guide, we’ll explore proven methods to waterproof your home. We’ll cover everything from identifying problem areas to DIY solutions and when to call in the professionals. By the end of this article, you’ll have the knowledge to make informed decisions about safeguarding your home against water intrusion.
Table of Contents
- Why Waterproofing Is Essential
- Identifying Problem Areas
- Exterior Waterproofing Methods
- Interior Waterproofing Solutions
- Roof Waterproofing
- Basement and Crawl Space Waterproofing
- Window and Door Sealing
- Gutter and Drainage Systems
- Foundation Protection
- Waterproofing Materials and Products
- DIY vs. Professional Waterproofing
- Legal Requirements and Building Codes
- Maintenance Tips to Prevent Water Damage
- Common Mistakes to Avoid
- Conclusion
- About Wrestore
1. Why Waterproofing Is Essential
Waterproofing is not just about preventing puddles or damp spots; it’s about protecting the structural integrity of your home. Water intrusion can lead to serious issues such as:
Consequences of Water Damage:
- Structural Damage: Water can weaken foundations, walls, and floors.
- Mould and Mildew Growth: Moist environments promote the growth of harmful fungi.
- Health Risks: Mould spores can cause respiratory issues and allergies.
- Decreased Property Value: Visible water damage can deter potential buyers.
- Increased Repair Costs: Early prevention is more cost-effective than extensive repairs.
SEO Keywords: importance of waterproofing, water damage prevention, home waterproofing benefits
2. Identifying Problem Areas
Before implementing waterproofing solutions, it’s crucial to identify the areas in your home that are susceptible to water intrusion.
Common Problem Areas:
- Basements and Crawl Spaces: Prone to groundwater seepage and humidity.
- Roof and Attic: Leaks due to damaged shingles or poor ventilation.
- Windows and Doors: Gaps and cracks around frames allow water entry.
- Exterior Walls: Cracks or porous materials can absorb moisture.
- Foundations: Poor drainage can lead to water pooling around the foundation.
- Plumbing Fixtures: Leaky pipes and appliances contribute to moisture problems.
Inspection Tips:
- Visual Examination: Look for signs of water stains, peeling paint, or damp spots.
- Check for Odours: Musty smells indicate mould growth.
- Use Moisture Meters: Measure the moisture content in walls and floors.
- Inspect After Rain: Check for leaks or dampness following heavy rainfall.
Tip: Regular inspections help detect issues early, making them easier and cheaper to fix.
3. Exterior Waterproofing Methods
Exterior waterproofing involves protecting your home’s outer surfaces to prevent water from entering.
Methods:
- Waterproof Coatings: Apply waterproof paints or sealants to exterior walls.
- Exterior Drainage Systems: Install French drains or footing drains to divert water away from the foundation.
- Landscaping Grading: Ensure the ground slopes away from your home to prevent water pooling.
- Seal Cracks and Gaps: Use caulk or sealant to fill in exterior cracks.
- Install Waterproof Membranes: Apply membranes to foundations and walls for added protection.
SEO Keywords: exterior waterproofing, waterproof coatings, drainage systems, foundation waterproofing

4. Interior Waterproofing Solutions
Interior waterproofing focuses on controlling moisture and preventing water damage from within the home.
Methods:
- Sealant Applications: Use waterproof sealants on interior walls and floors.
- Sump Pumps: Install sump pumps to remove accumulated water from basements or crawl spaces.
- Interior Drainage Systems: Set up channels that direct water to a sump pump.
- Vapour Barriers: Install barriers to prevent moisture from passing through walls and floors.
- Dehumidifiers: Use to reduce humidity levels and prevent condensation.
Tip: Interior solutions are often used in conjunction with exterior methods for comprehensive protection.
5. Roof Waterproofing
The roof is your home’s first line of defence against the elements. Proper waterproofing prevents leaks and extends its lifespan.
Methods:
- Regular Maintenance: Inspect for damaged or missing shingles and repair promptly.
- Roof Coatings: Apply waterproof coatings or sealants designed for roofing materials.
- Install Underlayment: Use waterproof underlayment beneath shingles for added protection.
- Repair Flashing: Ensure flashing around chimneys, vents, and skylights is intact and sealed.
- Gutter Maintenance: Keep gutters clean to prevent water backup and roof edge damage.
SEO Keywords: roof waterproofing, prevent roof leaks, roof maintenance tips
6. Basement and Crawl Space Waterproofing
Basements and crawl spaces are particularly vulnerable to water intrusion due to their proximity to groundwater.
Methods:
- Exterior Excavation: Dig around the foundation to apply waterproof coatings or membranes.
- Interior Sealants: Apply sealants to walls and floors to prevent moisture penetration.
- Sump Pumps: Install to remove water that accumulates in these areas.
- Drainage Systems: Use interior or exterior drainage systems to redirect water.
- Encapsulation: Seal crawl spaces with vapour barriers to prevent moisture ingress.
Tip: Monitor humidity levels with a hygrometer and use dehumidifiers if necessary.
7. Window and Door Sealing
Windows and doors are common entry points for water, especially during heavy rain or storms.
Methods:
- Weatherstripping: Install weatherstripping around doors and windows to seal gaps.
- Caulking: Use exterior-grade caulk to seal cracks and gaps around frames.
- Install Storm Windows/Doors: Provide additional protection against the elements.
- Regular Maintenance: Repair or replace damaged seals and frames promptly.
- Proper Installation: Ensure windows and doors are correctly installed to prevent leaks.
SEO Keywords: window sealing, door waterproofing, prevent window leaks
8. Gutter and Drainage Systems
Effective gutter and drainage systems are essential for directing water away from your home.
Methods:
- Regular Cleaning: Remove leaves and debris to prevent clogs.
- Install Gutter Guards: Reduce debris accumulation and maintenance needs.
- Extend Downspouts: Ensure water is discharged at least 3 feet away from the foundation.
- French Drains: Install to collect and redirect groundwater away from the home.
- Surface Drainage: Use swales or grading to direct surface water away.
Tip: Inspect gutters and downspouts after storms to ensure they’re functioning properly.
9. Foundation Protection
The foundation is critical to your home’s stability. Protecting it from water damage is essential.
Methods:
- Apply Waterproof Membranes: Use specialized membranes on exterior foundation walls.
- Seal Cracks: Repair foundation cracks promptly using epoxy injections or sealants.
- Install Drain Tiles: Place around the foundation to collect and redirect water.
- Maintain Landscaping: Keep plants and trees away from the foundation to prevent root damage and moisture accumulation.
- Slope Ground Away: Ensure the ground around the foundation slopes away to prevent pooling.
SEO Keywords: foundation waterproofing, protect home foundation, prevent foundation water damage
10. Waterproofing Materials and Products
Selecting the right materials is crucial for effective waterproofing.
Common Materials:
- Waterproof Paints and Sealants: For interior and exterior surfaces.
- Membranes: Liquid-applied or sheet membranes for walls and foundations.
- Caulks and Sealants: For sealing gaps and cracks.
- Waterstops: Used in concrete joints to prevent water passage.
- Vapour Barriers: Plastic sheets installed in walls or under flooring.
- Drainage Composites: Combine drainage and protection layers for foundations.
Product Selection Tips:
- Quality Over Cost: Invest in reputable brands for durability.
- Compatibility: Ensure materials are suitable for the surfaces and conditions.
- Read Reviews: Check customer feedback and expert recommendations.
- Environmental Considerations: Choose eco-friendly products when possible.
Tip: Consult with professionals or suppliers to select the best products for your specific needs.
11. DIY vs. Professional Waterproofing
Deciding whether to tackle waterproofing yourself or hire professionals depends on several factors.
When to DIY:
- Minor Repairs: Small cracks, simple sealant applications.
- Accessible Areas: Tasks that don’t require special equipment or access to confined spaces.
- Budget Constraints: DIY can be more cost-effective for straightforward projects.
- Skill Level: If you have experience with home repairs and feel confident.
When to Hire Professionals:
- Structural Issues: Significant foundation cracks or structural damage.
- Comprehensive Waterproofing: Large-scale projects requiring specialized materials and techniques.
- Building Codes and Regulations: Work that requires permits or must meet specific standards.
- Safety Concerns: Tasks involving heights, confined spaces, or hazardous materials.
- Guarantees: Professionals often provide warranties on their work.
SEO Keywords: DIY waterproofing, professional waterproofing services, when to hire waterproofing experts
12. Legal Requirements and Building Codes
Adhering to local building codes and regulations is essential to ensure your waterproofing efforts are compliant and safe.
Considerations:
- Permits: Some waterproofing projects may require permits from your local council.
- Building Regulations: Ensure compliance with UK Building Regulations, particularly regarding structural work and damp proofing.
- Listed Buildings: Additional restrictions may apply for historic properties.
- Professional Certifications: Use certified professionals when required by law.
- Insurance Implications: Non-compliant work may affect your home insurance coverage.
Tip: Always check with local authorities or consult professionals if unsure about legal requirements.
13. Maintenance Tips to Prevent Water Damage
Regular maintenance is key to preventing water intrusion and prolonging the effectiveness of waterproofing measures.
Tips:
- Inspect Regularly: Check your home for signs of water damage at least twice a year.
- Clean Gutters: Remove debris to ensure proper water flow.
- Maintain Seals: Reapply caulk or sealants as needed around windows, doors, and other openings.
- Monitor Humidity Levels: Use dehumidifiers in moisture-prone areas.
- Repair Promptly: Address any damage or wear immediately to prevent escalation.
- Landscape Wisely: Keep vegetation trimmed and away from the home’s exterior walls.
SEO Keywords: water damage prevention, home maintenance tips, waterproofing upkeep
14. Common Mistakes to Avoid
Avoiding common pitfalls ensures your waterproofing efforts are effective and long-lasting.
Mistakes:
- Ignoring the Underlying Cause: Failing to address the root cause of water intrusion leads to recurring problems.
- Using Incorrect Materials: Selecting the wrong products can result in ineffective waterproofing.
- Improper Application: Not following manufacturer instructions can compromise effectiveness.
- Skimping on Preparation: Poor surface preparation reduces adhesion and durability of coatings and sealants.
- Neglecting Ventilation: Adequate ventilation is essential to prevent condensation and mould growth.
- Overlooking Maintenance: Failing to maintain waterproofing measures reduces their lifespan.
- Attempting Complex Repairs Alone: DIY fixes for major issues can be unsafe and ineffective.
Tip: When in doubt, consult a professional to avoid costly mistakes.
15. Conclusion
Waterproofing your home is a vital investment in its longevity, safety, and value. By implementing the proven methods outlined in this guide, you can effectively protect your property from water damage. Whether you choose to tackle minor projects yourself or hire professionals for more extensive work, proactive waterproofing measures will save you time, money, and stress in the long run.
Remember, regular maintenance and timely repairs are essential to keep your home dry and secure. Stay vigilant for signs of water intrusion, and don’t hesitate to seek expert advice when necessary. With the right approach, you can enjoy a comfortable, healthy living environment free from the worries of water damage.
16. About Wrestore
Commercial and Residential Property Maintenance Specialists
At Wrestore, we are dedicated to helping homeowners maintain and enhance their properties. Based in London and serving areas within the M25, we bring over 30 years of combined experience in the property and built environment sector.
Our Services Include:
- Waterproofing Solutions: Professional assessment and implementation of waterproofing methods tailored to your home’s needs.
- General Maintenance: From routine upkeep to minor repairs, we keep your property in optimal condition.
- Plumbing: Expert installations and repairs by certified professionals.
- Electrics: Safe and certified electrical services for peace of mind.
- Decorating: Professional painting and decorating to transform your space.
- Refurbishment: Comprehensive property upgrades tailored to your needs.
- Handyman Services: Versatile assistance for various tasks around your property.
Why Choose Wrestore?
- Reliability: We deliver hassle-free, dependable service that you can trust.
- Expertise: Our skilled team ensures high-quality workmanship on every project.
- Accreditations: We are accredited by Alcumus SafeContractor, Alcumus SafePQQ, and Gas Safe Register, demonstrating our commitment to safety and professionalism.
- Customer Satisfaction: See our reviews on Trustpilot and discover why clients choose us for their property maintenance needs.
Contact Us Today
Phone: +44 (0)207 183 2771
Email: works@wrestore.co.uk
Address: 227 Waterloo Road, London, SE1 8XH
Visit our website to learn more about how we can assist you in maintaining and enhancing your property.
Protecting your home from water damage is an investment in its future. Start implementing these proven waterproofing methods today and enjoy peace of mind knowing your property is secure.
Note: This blog post is intended for informational purposes and should not replace professional advice. Always consult qualified professionals for specific concerns related to your property’s waterproofing needs.